Top tools for API Load Testing

Introduction
Picture this: You've poured your heart and soul into building an amazing app with slick APIs. You've tested it manually, and everything seems perfect. But as you gear up for launch day, a nagging worry creeps in – will your creation survive the onslaught of real-world users?
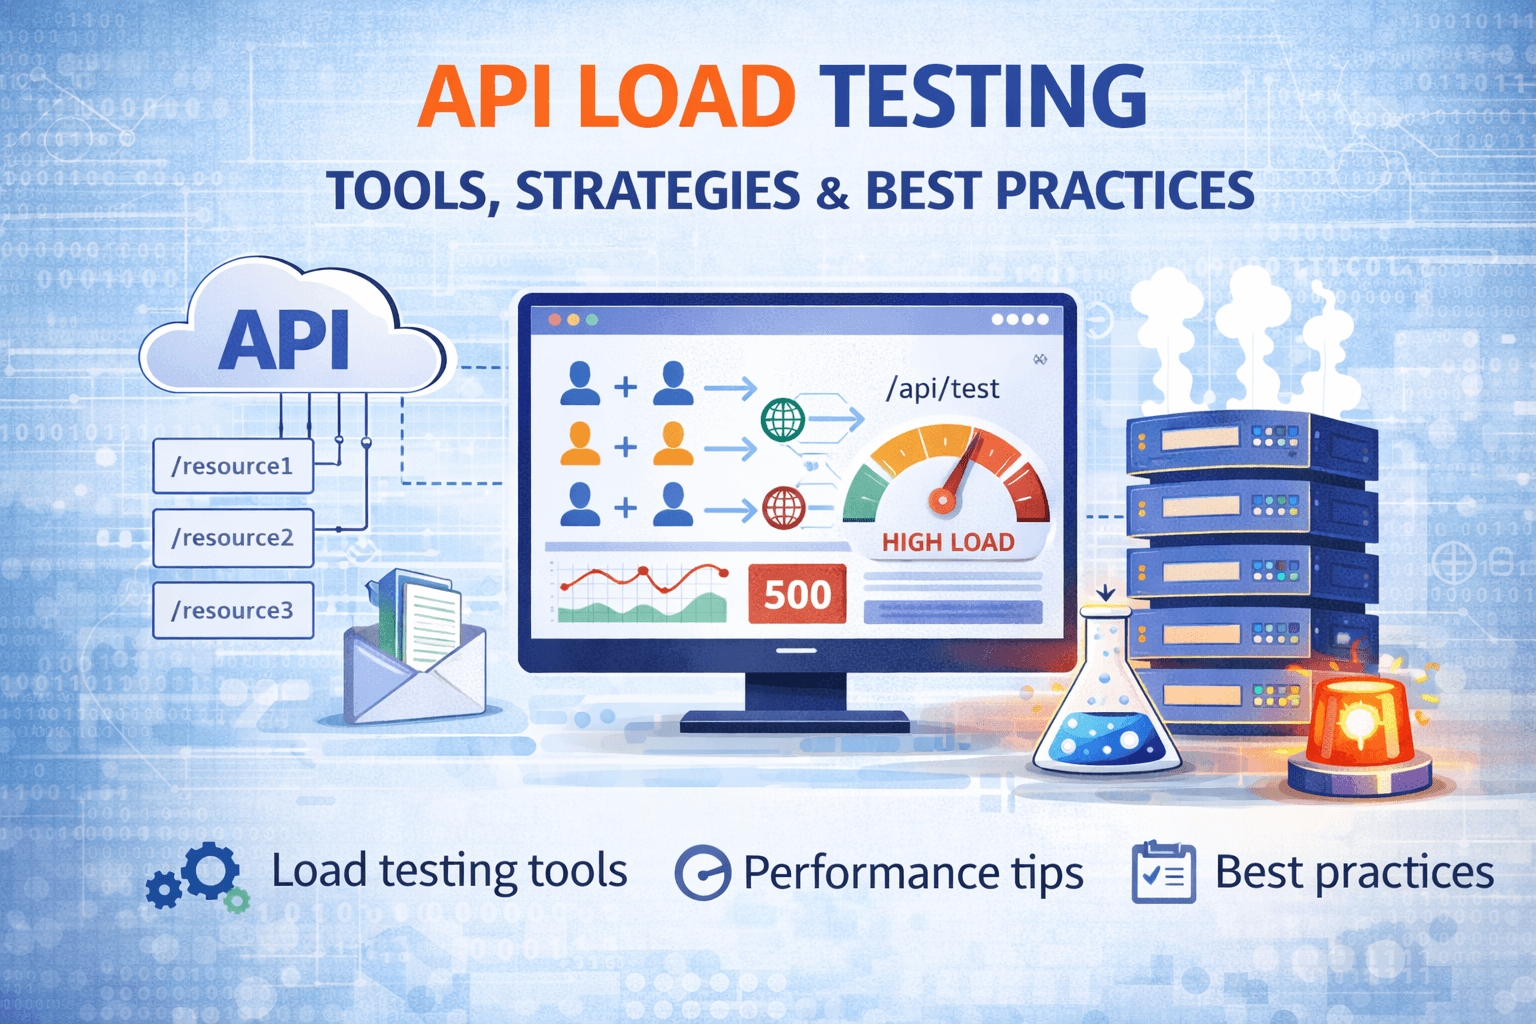
That's where API load testing swoops in to save the day (and potentially your sanity). It's not just a fancy term to impress your boss; it's your secret weapon for a smooth launch and happy users.
Why API Load Testing is Your New Best Friend:
Dodge the Downtime Bullet: Nobody wants their app crashing faster than you can say "server overload." Load testing helps you find and fix performance bottlenecks before they become real-world nightmares.
Know Your Limits (and Then Crush Them): Discover exactly how much traffic your APIs can handle. Then, optimize until your app can take on a virtual stampede of users without breaking a sweat.
Boost User Happiness: Slow APIs are the ultimate buzz-kill. Load testing ensures your app stays snappy, even when everyone and their grandma decides to use it at once.
Sleep Better at Night: Launch day jitters? Not you! With thorough load testing, you can feel confident your app is ready for whatever the internet throws its way.
What Do API SLOs Look Like in Action?
Let’s bring the idea of SLOs (Service Level Objectives) down to earth, think of them as the measuring sticks for your API’s awesomeness. Here are a couple of real-life examples you’ll probably recognize if you’ve ever dealt with user-facing apps:
Speed Demons Wanted: You could set an SLO stating that 99% of all requests for product details should zip back to the user in under 600 milliseconds.
Login Without Lag: Or, if you’re tracking authentication, maybe 99.99% of all failed login attempts must return a result in less than a second.
Bottom line? These targets help you draw a clear line between “rockstar API” and “back to the drawing board.” Knowing what to shoot for keeps your performance game strong, and your users happy.
The Catch? It's Trickier Than It Looks
While API load testing is crucial, it's not always a walk in the park. Here's the deal:
One Size Doesn't Fit All: Your app is unique, and so are its testing needs. Finding the right approach takes some trial and error.
Start Simple, Test OftenIt's tempting to jump in and build a massive, complex test suite right out of the gate. But here's a pro tip: begin with small, straightforward tests, think single endpoints or basic integrations. Run them frequently, learn from the results, and gradually build up your arsenal as you go. Iteration is your friend; let your tests evolve as your app grows and your confidence builds.
Real-World Chaos is Hard to Simulate: Creating tests that truly mimic unpredictable user behavior is an art form.
Data Overload: Load tests generate mountains of data. Knowing what to focus on takes practice.
And there’s more, some practical hurdles pop up depending on the tools you choose. Think: learning curves, programming knowledge, resource requirements, and yes, sometimes even the dreaded extra cost. Here are a few common “gotchas” across popular tools:
Steep Learning Curves: Some tools require you to brush up on programming languages like Scala or Python, or to get comfy with scripting in JavaScript or YAML. Not exactly “plug and play” if you’re just getting started.
Resource Hungry: Browser-based and Java-based tools can gobble up your system’s resources, especially for complex or large-scale tests.
Feature Overload: Many platforms pack in a dizzying array of features. While powerful, they can overwhelm newcomers trying to find their footing.
Paywalls & Plan Limits: Free plans often come with strings attached, restricted test durations, limited URLs, or fewer advanced features. More muscle means more money.
Customization Challenges: Some tools don’t offer deep customization or lack real-browser testing, while others might restrict you to certain protocols or use cases.
But don't worry! We're about to dive into some awesome tools that make API load testing way more manageable. Whether you're a seasoned pro or just dipping your toes into the testing waters, there's something here for everyone.
Pro Tip: Start simple and test frequently. Iterate and grow your test suite as your app evolves. Load testing isn’t about nailing perfection on your first try, it's about building momentum and learning as you go. Small, regular tests give you a much clearer picture of your API’s health and make it way easier to spot issues before they snowball.
Ready to see which tools can help you on this journey? Let’s jump in.
How Does API Load Testing Actually Work?
Okay, so you're convinced load testing is essential. But what does the process really look like? Once you've nailed down your goals and questions, your API load testing adventure usually follows a roadmap like this:
Script the Test: Sketch out realistic user flows, set up test data, and organize your endpoints into logical groups. This scripting is your blueprint for how users will interact with your API under pressure.
Assert Performance and Correctness: It's not enough for your API to just respond – it needs to respond right and fast. Use checks to verify system responses and set thresholds to make sure performance stays within your service level objectives (SLOs).
Model and Generate Load: Choose your load patterns wisely! Decide how many users, what kind of requests, and from where the traffic should come. The goal is to mirror real-world conditions as closely as possible.
Iterate and Refine: Don’t just test once and call it a day. Reuse your scripts as your app evolves, tweak scenarios for broader coverage, and, over time, integrate these tests into your automated pipelines.
The bottom line? Load testing is both a science and a bit of an art. It’s about crafting smart scenarios, wrangling a ton of data, and turning chaos into confidence. And yes, while it might sound daunting, with the right approach (and tools), you’ll be ready to handle whatever your users throw at you.
What to Keep in Mind When Crafting Your Load Testing Scripts
Alright, so you're ready to jump into the world of API load testing scripts. Before you start unleashing virtual users like confetti, there are some smart strategies to keep your scripts effective (and your sanity intact). Here's what sets a rock-solid load test script apart:
1. Mix Up Your Data (a.k.a. Data Parameterization)
Hard-coding the same user credentials or request bodies? That’s a fast track to boring, unhelpful tests. Instead, feed your scripts with dynamic, varied data, think different usernames, passwords, or test payloads for every virtual user. Using data files or arrays to randomize values makes your load test feel like real-life traffic, not a rehearsal with identical clones.
2. Embrace Error Handling
Under a heavy load, things will go sideways. Your script shouldn’t fall apart at the first error message, it should catch and log those hiccups like a pro. Make sure your logic gracefully handles failures, retries when appropriate, and keeps pushing forward. This way, you’re not just seeing how your API performs when everything is perfect, but how it behaves under stress and when things break.
3. Build Reusable and Modular Code
Load tests have a tendency to balloon in complexity as your API matures and new scenarios pop up. Save yourself from rewriting the same login or data-fetch scenario by making your script modular. Break common steps into reusable functions or modules, it’ll pay off big time as your test suite grows.
4. Watch Out for Dynamic URLs and Endpoints
Lots of APIs use endpoints that change per user or request (like /orders/{orderId}). If you’re not careful, your reports can get cluttered fast. Consider grouping metrics for these dynamic endpoints so you aren’t buried under a mountain of per-URL statistics.
5. Location, Location, Location
Where you run your load generator matters more than you think. Running tests close to your servers doesn’t mimic the real world if your users are halfway across the globe. To get results that actually reflect your user base, ensure your load runs from appropriate regions, or, at a minimum, stays consistent for baseline comparisons.
6. Testing Private/Internal APIs
Not all APIs are open to the public, in fact, many are behind firewalls or within private networks. For these, you’ll want to run your tests from within your network environment. Plan ahead so your scripts can reach those internal endpoints, whether that's using local test runners or configuring your cloud-based platform to connect securely.
By laying a strong foundation for your load test scripts, you’ll set yourself up for actionable results, and avoid the common pitfalls that trip up even the most enthusiastic testers.
The Main Types of API Load Tests
So, how do you actually put your APIs through their paces? There’s no one-size-fits-all approach, but here are the classic load test “flavors” you’ll want to know:
Smoke Testing: Think of this as the API version of turning the key to see if the engine starts. With a small, minimal load, you make sure everything basically works before turning up the heat.
Average Load Testing: Here, you simulate the day-to-day traffic your app expects. This is all about seeing how your APIs perform under normal conditions, so those “typical Monday morning” numbers? That’s what you’re testing for.
Stress Testing: Push things to the limit! Stress testing helps you find the point where your API starts sweating under high traffic, whether that’s a flash sale or a viral moment.
Spike Testing: What happens when a thousand users hammer your app all at once? Spike tests throw massive, sudden bursts of traffic at your APIs to check if they can roll with the punches.
Breakpoint Testing: This one’s about slow and steady pressure. You gradually ramp up the number of requests until something finally gives, revealing the weak link in your system.
Soak Testing: Will your API stay cool under fire… for hours on end? Soak tests simulate sustained heavy loads, checking for sneaky issues that only show up after a marathon session.
Mix and match these tests based on your launch-day fears (and dreams), and you'll get a true picture of what your API can handle.
The Key Metrics That Matter Most
So, what should you actually pay attention to during API performance testing? Two heavy-hitters top the list: latency and availability.
Latency measures how quickly your API responds when someone knocks on its door. If users are left drumming their fingers waiting for a response, that spells trouble. Lightning-fast APIs win hearts (and market share).
Availability keeps an eye on the reliability front, how often your API comes back with the right answer instead of a dreaded error code. An API that’s always up and running makes both users and support teams happy.
Savvy testers track these metrics using numbers like average response time, median, percentiles (like 90th or 95th for those edge cases), and, of course, the error rate (% of failed requests vs. Total requests). If your app can keep response times low and errors at zero (or close to it) as the user count rises, you’re in great shape.
But don't worry! We're about to dive into some awesome tools that make API load testing way more manageable. Whether you're a seasoned pro or just dipping your toes into the testing waters, there's something here for everyone.
What to Ask Yourself Before Diving In
Before you unleash a barrage of virtual users on your API, take a breather and ask yourself a few key questions. Consider these your load testing warm-up stretches:
What exactly are you trying to test? Is it specific endpoints, user journeys, or that one cranky feature everyone complains about?
How will you structure your test? Will you simulate steady traffic, wild surges, or bizarre user behavior at 3AM?
What does "success" look like? Is there a specific response time you need to hit, or a maximum error rate you're willing to tolerate?
Do you have any critical SLAs (Service Level Agreements) or business requirements your API simply must meet, no matter what?
Are there dependencies (like third-party services or databases) that could throw a wrench in your results?
Clarifying your goals up front means you won’t waste time running tests that feel like elaborate science experiments with no meaningful outcome. Start with a plan, and you’ll get insights you can actually use.
Handling API Errors Without Losing Your Cool
Let's face it, under heavy load, even the best APIs start sweating. Suddenly, those spotless test runs are riddled with errors you hoped you'd never see. But this is good news! Catching these hiccups before your users do means you’re being a proactive superhero, not a panicked firefighter.
So, how do you make sure your load testing scripts don’t melt down the moment things go sideways? Here are a few tricks of the trade:
Plan for Failure, Not Perfection: It's tempting to assume every request will be sunshine and rainbows. But during real load, you’ll hit rate limits, server hiccups, and the occasional weird 500 error. Design your scripts to expect (and gracefully handle) these.
Check Those Responses: Always verify your API responses before charging ahead with the next step. If your script tries to do something with a failed response, like parse missing data, it might crash and burn. Add checks to ensure responses are valid before moving forward.
Fallbacks and Logging: When a call fails, log it (with as much context as possible!) and decide what happens next. Do you retry? Skip? Collect stats for a post-mortem? Decide ahead of time instead of leaving it to chance.
Avoid Chaining on Failure: If your script depends on the result of a previous request, double-check the first one actually succeeded. Otherwise, you might be asking an empty object for its favorite color, and runtimes are not fans of existential crises.
A quick example: let’s say you’re creating a user and then updating them. If creating the user fails, skip the update for that user rather than force it and watch your script unravel.
To sum up: embracing errors in your load test scripts makes your testing more robust, your results more realistic, and your launches a lot less stressful.
Now, let’s roll up our sleeves and look at the tools that can help you make all this error-wrangling a breeze.
Top API Load Testing Tools
1. Qodex.ai
Description: Commercial web service for API testing and monitoring
Key Features:
AI-powered test generation
Real-time API monitoring
Automated regression testing
CI/CD integration
Pros:
User-friendly, beginner-friendly interface
AI reduces manual test writing
Comprehensive health monitoring
Supports various protocols
Cons:
AI suggestions may need adjustment for complexity
2. Artillery
Description: Open-source command-line tool focused on simplicity and power
Key Features:
YAML-based test scripts
Supports HTTP, WebSocket, Socket.io
Built-in testing scenarios
Pros:
Easy to learn/configure
Lightweight and fast
CI/CD integration
Detailed HTML reports
Cons:
No GUI
Limited protocol support
No distributed testing in open-source version
3. Gatling
Key Features:
Scala-based DSL for tests
Asynchronous architecture
Real-time metrics and reports
Pros:
Excellent performance with high concurrency
Expressive DSL for complex scenarios
Good documentation and community
Built-in recorder
Cons:
Steep learning curve (Scala)
Limited protocol support
Complex distributed setup
4. JMeter
Description: Open-source tool, established since 1998
Key Features:
Multi-protocol support (HTTP, JDBC, LDAP, etc.)
Highly extensible with plugins
GUI for test creation/debugging
CLI mode for CI/CD
Built-in reporting/analysis
Pros:
Free, open-source
Large community and documentation
Flexible/customizable
Simulates heavy loads on various servers
Distributed testing
Cons:
Java-based, resource-intensive
GUI can be dated/overwhelming
Steep learning curve
Time-consuming for complex scenarios
5. BlazeMeter
Description: Commercial PaaS, JMeter-compatible
Key Features:
Cloud-based, global distribution
CI/CD integration
Advanced reporting/analytics
Supports multiple testing types
Pros:
Easy scaling
Familiar for JMeter users
Comprehensive test management
Strong integrations
Cons:
Expensive at scale
Advanced features restricted to higher tiers
Steep learning curve for JMeter newcomers
Final thoughts:
Each tool’s strengths and drawbacks
Choice depends on needs, expertise, budget
Options for both open-source (Artillery, Gatling) and commercial (Qodex.ai, BlazeMeter) preferences
6. k6
If you're itching to see what a barebones API load test looks like, here's a simple example using k6, a popular tool among developers looking for scriptable power without a headache.
Minimal k6 Script Example:
This pint-sized script sends a single POST request with a sample JSON payload, just enough to test that one endpoint is responding as expected. Most real-world load tests start with something this straightforward before scaling up to simulate multiple users and more elaborate API workflows.
Key Features:
JavaScript-based scripting, easy for most developers to pick up
Built-in support for HTTP protocols
CLI-driven for automation and CI/CD pipelines
Pros:
Lightweight and minimal learning curve for basic usage
Scripts can quickly grow from simple to complex as your needs evolve
Generates clear, actionable reports
Cons:
Lacks a graphical user interface for those who prefer visual tools
More advanced scenario modeling may require extra scripting
Distributed testing requires integration with external systems or services
Artillery
Artillery is an open-source command-line tool that emphasizes simplicity and power.
Key Features:
YAML-based test scripts
Support for HTTP, WebSocket, and Socket.io
Built-in support for various testing scenarios
Pros:
Easy to learn with YAML configuration
Lightweight and fast
Great for CI/CD integration
Generates detailed HTML reports
Cons:
No built-in GUI, which might deter some users
Limited to protocols it directly supports
Lack of distributed testing in the open-source version
Protocol Support: More Than Just HTTP
While Artillery shines with HTTP and WebSocket APIs, it's worth noting that modern APIs come in all flavors, not just HTTP. Out of the box, Artillery supports popular protocols like HTTP/1.1, WebSockets, and Socket.io, which covers a huge chunk of real-world use cases. However, if your stack includes something more exotic, think gRPC, Redis, or message brokers, Artillery's direct support is more limited compared to some alternatives.
That said, the tool’s extensibility means you’re not totally out of luck. Thanks to a growing ecosystem of plugins and community-driven extensions, you can broaden Artillery’s protocol reach to fit your needs. Still, for ultra-specialized protocols (like Avro, ZeroMQ, or NATS), you might need to look into dedicated tools or custom scripting.
Real-World Flexibility
Modern infrastructure is a wild place: APIs might talk over HTTP, but they also rely on other protocols for performance, throughput, or reliability. If your testing needs stretch beyond what Artillery natively supports, it’s important to consider this as you choose your toolset. Artillery’s sweet spot is fast, scriptable, and straightforward load testing for the most common API patterns, perfect for web apps, RESTful APIs, and anything speaking HTTP or WebSocket.
In short: Artillery is a great pick for most web and API testing scenarios, with just enough flexibility for the adventurous. If you need deep protocol support out of the box, you may want to keep reading.
Apache JMeter
Apache JMeter is a powerful, open-source load testing tool that's been a go-to choice for developers since 1998.
Key Features:
Multi-protocol support (HTTP, JDBC, LDAP, etc.)
Highly extensible through plugins
GUI for test plan creation and debugging
Ability to run in CLI mode for CI/CD integration
Built-in reporting and result analysis
But JMeter’s superpower isn’t just its age or flexibility, it’s the sheer breadth of protocols it can handle out of the box and through its rich plugin ecosystem. While HTTP APIs are its bread and butter, JMeter also supports testing a wide range of API types and protocols, making it a solid fit for modern infrastructures that rely on more than just REST.
Protocol Support Highlights:
HTTP/1.1, HTTP/2
WebSockets
JDBC (for database load testing)
LDAP
FTP
JMS
SMTP, POP3 (for mail servers)
Native support for custom plugins, so you can extend to nearly any protocol you need
And if you run into something truly exotic? There’s a thriving library of community plugins, covering everything from MQTT to AMQP and more. You can even build your own extensions for protocol-specific requests, perfect for those bleeding-edge projects.
This versatility means JMeter isn’t just for web APIs; it’s a Swiss Army knife for load testing across different layers of your stack, whether you’re hammering a gRPC endpoint, stress-testing a legacy database, or simulating chatty WebSocket clients.
By combining extensibility with mature reporting tools and community support, JMeter remains a top pick for both classic and cutting-edge API load testing scenarios.
Open-Source Powerhouse: Next-Gen Performance Testing Tools
Ever wish your load testing tool was as flexible as your favorite pair of running shoes? Enter the new wave of open-source performance testers. With their latest major releases, these tools are all about making your life easier, think smooth test creation, rock-solid reliability, and scalability to match your wildest traffic spikes.
Here’s why developers are buzzing:
Script Like a Pro: These tools let you write test scripts in JavaScript or TypeScript, making it easy to create real-world usage scenarios without needing to learn an obscure niche language.
Cloud-Ready: Scale up from your laptop to the cloud in a flash, perfect for simulating thousands (or even millions) of users without breaking a sweat.
Insightful Reporting: Say goodbye to confusing walls of numbers. Modern dashboards break down performance metrics, bottlenecks, and trends with crystal clarity, so you always know where to focus your optimization efforts.
Seamless Integrations: Plug right into your favorite CI/CD and monitoring stacks (like Jenkins, GitLab, or Datadog) to automate tests and catch issues before your users ever notice.
Community Support: Backed by thousands of developers worldwide, you’ll never struggle alone. Frequent updates and a massive library of plugins mean the tool grows right alongside your project.
In short: If you want a reliable, battle-tested, and endlessly customizable way to stress-test your APIs, open-source solutions have never been more ready for prime time.
Visual Interface Power: Build Test Scripts Without Coding Headaches
Ever wished you could skip wrestling with JavaScript just to set up a load test? Visual interface tools make it happen. Instead of diving into lines of tricky code, you get a user-friendly, drag-and-drop canvas where you can map out testing scenarios, kind of like assembling Lego blocks for your API.
Here's why this rocks:
No coding? No problem! You simply select operations, define test flows, and set up logic, all with clicks, not scripts.
Easy to tweak and update: Spotted a change? Adjusting your test is as simple as a few clicks, with no code breakage to worry about.
Visual feedback lets you see your test plan at a glance, so you always know what’s going to happen (and when).
Great for teams: Non-developers can pitch in, review, and even build tests without learning a programming language.
Perfect for anyone who wants to focus on performance testing, not the fine print of code syntax.
Kickstart Your Tests: Auto-Generate Scripts with Proxy Recorders
Let’s say you want to ramp up your API load tests but dread writing every script by hand (because, let’s be real, who doesn’t?). Good news: you can fast-track the process by capturing real user behavior with a proxy recorder.
Here’s how it works:
Record Your Session: Use a proxy recorder tool, think classics like Fiddler or the GitLab HAR recorder, to capture all the network traffic as you interact with your app.
Export in HAR Format: Once you’ve wrapped up your “real user” session, export the data in HAR (HTTP Archive) format, a common file type these tools support.
Convert to a Testing Script: Tools like har-to-k6 let you transform that HAR file directly into a test script. Just run a command like:
Tweak and Test: Open up your shiny new script, fine-tune it as needed, and then run it with your favorite load testing tool.
This approach is a major time-saver for getting started with more realistic, end-to-end tests. While auto-generated scripts make prototyping a breeze, it’s still a smart move to brush up on script editing so you can refine scenarios to truly match real-world chaos.
How to Test Internal APIs That Aren't Public
So, what if your API isn't meant to see the light of day (at least, not yet)? Maybe it lives behind a firewall or inside a cozy little private network. No worries, internal APIs can (and should!) get their fair share of load testing love too.
Here’s how you can roll up your sleeves and test those hidden endpoints:
Run Tests From Inside Your Network: The simplest approach is to execute your load tests from a machine already behind your firewall. Tools like k6, Artillery, or JMeter can all be set up locally or within your internal environment. This way, your tests hit the API directly, no need to punch extra holes in your security.
Harness Your Kubernetes Clusters: If you're running your stack on Kubernetes, you can deploy your testing tool as a pod or job inside the same cluster. This is a rock-solid way to keep everything close together and secure.
Selective Firewall Access (If Needed): If you absolutely must run cloud-based tests, you can temporarily allow traffic from your testing provider’s IP addresses, but always double-check those security rules!
Results & Reporting: No matter where you run your tests, most modern tools let you store results wherever you need, think dashboards, cloud storage, or your favorite monitoring system.
The bottom line: testing internal APIs might take a bit of setup, but with the right approach, you’ll know exactly how your private endpoints stand up to heavy use, without compromising security or losing sleep.
How Different Load Test Types Shape Your Testing Strategy
Before you unleash a tidal wave of virtual users on your APIs, pause for a quick gut check: What exactly are you trying to prove? The magic of API load testing lies in matching your approach to your goals, and that starts with picking the right test types for your needs.
Here’s how each kind of load test carves out its own niche in planning and shaping your testing process:
Smoke Tests: Think of these as a quick systems check, ideal for making sure the basics don't implode with even a trickle of traffic.
Average-Load Tests: These focus on your API’s day-to-day “normal.” If your app can handle the routine hustle without breaking a sweat, you’re off to a solid start.
Stress Tests: This is where you crank the dial to eleven. Intentionally push your API past its comfort zone to see what buckles first. It’s like fire drill practice for your server.
Spike Tests: Perfect if you expect unpredictable surges (hello, flash sales!). Rattle your API with sudden bursts of users and see how it rebounds.
Breakpoint Tests: These tests keep upping the ante until something finally gives. It’s the digital equivalent of “how many jellybeans can fit in a jar” but way more useful.
Soak Tests: Run your API under a steady stream of traffic, sometimes for hours or days, to spot slow-burn issues (think memory leaks or creeping slowdowns).
By mixing and matching these tests, you shape a comprehensive game plan tailored for your application’s quirks and your business’s priorities. Start small, experiment with different styles, and build out a test suite that covers both expected traffic and those curveballs the real world loves throwing.
Stay nimble: the best testing strategies grow and adapt as your API, and your ambitions, scale up.
Why Writing Your Own Load Test Scripts Matters
With so many test converters and auto-recorders floating around (think Postman, Swagger, or even Chrome DevTools), it's tempting to let the tools do all the heavy lifting for you. They’re fantastic for spinning up quick tests or getting newcomers familiar with the process. But here's the secret sauce: learning to handcraft your own load testing scripts is a game-changer.
Why bother, when point-and-click tools exist? Because scripts you write yourself let you:
Customize Everything: No two APIs are identical. Handwritten scripts let you simulate complex user flows, quirky edge cases, and those wild, unpredictable scenarios that tools might overlook.
Flex Your Creative Muscles: Sometimes you need more than just the basics. Writing your own tests means you can combine steps, add realistic delays, randomize inputs, and push your apps in ways generic generators simply can’t.
Grow Your Skills: Like cooking from scratch instead of microwaving frozen dinners, scripting deepens your understanding. You’ll not only troubleshoot faster but also anticipate tricky bottlenecks before they cause chaos.
Converters and recorders are awesome springboards, but nothing beats the confidence of truly knowing what your tests are doing under the hood. Plus, you'll impress your team with your ninja-level API wrangling skills!
Making Sense of Your API Load Test Results
Once you've unleashed a tidal wave of simulated users on your API, it's time to dig into the data. But what numbers actually matter? Let's break it down:
Latency: The Need for Speed
First up, latency. This is your API's reaction time, the gap between a user making a request and your service responding. You'll want to check stats like:
Average response time: Is your API consistently quick, or just having the occasional lucky run?
Median (the middle value): Sometimes averages hide nasty slow spikes. Median keeps things honest.
Percentiles (like 90th or 95th): Want to know how your slowest responses are doing? Percentiles shine a light on those rare but painful slow-downs.
Maximum response time: What’s the worst case scenario your users might experience?
A speedy API keeps users happy and impatient bosses off your back.
Error Rates: Are You Serving Success (or Oops)?
Next, scan your error rates. These tell you how often your API is serving up an unexpected "nope" instead of the right answer. Zero errors is the dream, but if some requests are failing when the load ramps up, that’s a red flag.
Error percentage: Out of all requests, how many failed?
Types of failures: Is it a timeout, a 500 error, or something else sinister?
When do errors occur: Are they popping up only when things get busy, or are you seeing the same hiccups at lower loads?
Verifying Real Functionality Under Pressure
Beyond just numbers, you’ll want to double check your API is actually doing what it’s supposed to when stressed. This is where validations come in handy:
Set up conditions to make sure your API returns the right data, status codes, and overall logic, even with an army of simulated users.
Keep an eye out for quirky bugs that only appear when things get crowded.
With a smart mix of latency checks, error rate analysis, and a dash of real-world validation, you'll know for sure whether your API is ready for prime time or if it needs some extra TLC before launch.
Modeling and Configuring Workloads for API Load Tests
Before you unleash a stampede of virtual users on your API, you need to plan how you'll simulate real-world usage. Think of this as choreographing the dance floor before opening the club's doors, do you want a slow waltz, an electric mosh pit, or something in between? Here’s how you can tackle workload modeling like a pro:
Virtual Users vs. Request Rate: Two Main Workload Styles
There are two popular ways to configure how much traffic your API will face during load tests:
Concurrent Users (Virtual Users): This approach mimics a crowd of people interacting with your app at the same time. You choose the number of "virtual users" (or VUs) and tell them what to do and for how long. For example, you might spin up 50 users to hammer away for 30 seconds, each sending data, clicking buttons, and generally pretending to be a real person.
Requests Per Second (RPS): For those who prefer raw numbers, you can focus on sending a set number of requests per second, regardless of the number of users involved. This is great for stress-testing your server's sheer throughput, for example, holding a steady 100 requests per second for a fixed duration.
Don’t Forget About the Human Element: Sleep Time
Humans aren’t robots (yet), so your tests shouldn’t be either. Adding deliberate pauses (a.k.a. "sleep time") between actions helps mimic authentic usage patterns. This gives your scenarios a much-needed dose of reality, helping you spot bottlenecks that only show up when users behave unpredictably. Even a sprinkle of random pauses can prevent all your virtual users from marching in lockstep and creating unrealistic spikes.
If you’re only interested in maxing out throughput, you might keep sleep time to a minimum.
For realistic user journeys, sprinkle in a few seconds of downtime between actions, just like someone pausing to sip their coffee or rethink their next move.
Setting Up Your Test: What Parameters Matter?
Whether you’re focusing on virtual users or request rates, you’ll want to configure:
Number of virtual users or requests per second/minute
Duration of the test
Iterations per user (how many actions each one takes)
Ramp-up/ramp-down times (start slow, build up, wind down, no one likes a sudden stampede!)
Mix and match these elements to fit your app’s vibe and the kind of "crowd" you expect at launch. Try out different patterns: steady loads, spiky surges, or a slow-building crescendo to see how your API holds up.
Remember, the best workload model is the one that closely mirrors your users, quirks, pauses, and all.
Best Practices for Reusing and Modularizing Your Load Testing Scripts
Let’s face it: nobody wants to reinvent the wheel every time a new test case crops up. Efficient API load testing isn’t about brute-forcing your way through dozens of nearly identical scripts, it's about working smarter, not harder.
Here’s how to keep your sanity (and your codebase) squeaky clean:
Break Down Common Scenarios: Identify the user flows, edge cases, or setup routines that pop up again and again. Package these into bite-sized modules or functions. Think of them as your personal “greatest hits”, ready to drop into any new test.
Go Modular Early: Start modularizing as soon as your first tests roll out. It’s way easier to maintain (and debug) smaller building blocks than one sprawling spaghetti-test.
Reuse, Don’t Repeat: When it’s time to create a fresh load test:
Spin up a new test file.
Tweak your load parameters (like user count, duration, or data payloads) as needed.
Import your favorite, pre-built modules, no copy-paste nightmares required.
Mix and Match: Once you’ve got a stash of reusable bits, combine them to mimic complex, real-world traffic. For example, blend login, purchase, and checkout flows into one mighty stress test.
Document as You Go: Keep notes on what each module does and how to plug it in. Future you (and your teammates) will thank you.
By turning your test scripts into reusable Lego bricks, you’ll save time, dodge errors, and scale your testing coverage with ease. Now, let’s spotlight some tools that make all this even easier…
Mastering API Verification: Using Checks for Functional & Performance Confidence
Okay, let's say you've kicked off a blazing load test and the requests are flying like confetti at a parade, awesome! But the real question is this: how do you make sure your API isn’t just fast, but actually doing what it's supposed to do under pressure?
That’s where “checks” come in. Think of them as your backstage pass to see if your API’s logic, responses, and performance are hitting all the right notes, not just serving up status codes.
Here’s how you can level-up your load testing with checks:
Validate the Important Stuff: While raw speed is fun to brag about, it's not so cool if your API’s returning errors or the wrong data at warp speed. Checks let you ask automation-friendly questions like, “Did I get a 200 OK? Is the response format what I expect? Did my data save correctly?”
Spot the Sneaky Failures: Some bugs only crawl out when the going gets tough, like when traffic spikes during your Black Friday sale. By setting up checks on specific fields, headers, or business logic, you’ll spot those trickster errors that would otherwise hide in plain sight.
Automate the Detective Work: Modern load testing tools (think Postman, Qodex.ai, and others you’ll meet below) allow you to plug in checks as part of your scripts. If something weird starts to happen, say, your API returns the wrong payload once you hit 1,000 requests per second, you’ll get an instant heads up.
Don’t Panic About a Few Fails: Real talk: when pushing your API to the limit, a smattering of failures is totally normal and even expected. What matters is whether these hiccups fit within your acceptable error margins (aka your SLOs or “number of nines”).
Pro tip: When you design your load tests, mix in checks for the pieces of your API that matter most, like login flows, data creation, or payment processing. That way, you’re not just testing if your API survives the stampede, but if it does so with style and accuracy.
Now that you know how to combine performance and functionality checks...
Using Dynamic Test Data Like a Pro
Let's talk about spicing up your load tests with some real-world flavor. Hard-coding the same username and password for every virtual user? That's about as exciting as eating plain toast for every meal. To truly stress-test your APIs, you’ll want each virtual visitor to bring their own plate to the table, think different user IDs, passwords, or even payloads for every request.
Why bother with dynamic data?
Real-Life Simulation: Not all your users are named "testuser1," right? Mixing up credentials, payloads, or query parameters makes your tests way more like the real thing.
Uncover Sneaky Bugs: Some issues only rear their ugly heads when unique data is flowing through your system. Parameterizing inputs can help you spot these troublemakers early.
Scale Like a Champ: By varying data, you stress all the moving parts, caches, session stores, and more.
How can you do it?
Most load testing tools like k6, Artillery, or JMeter let you swap out stale, static data for fresh, dynamic values on the fly. Here’s a tried-and-true approach:
Prepare Test Data: Store multiple sets of data (like usernames, passwords, or tokens) in a file, CSV, JSON, you name it.
Load It Up: In your test script, read in this file so your virtual users can grab their own set of credentials each run.
Assign Dynamically: As each virtual user spins up, hand out a unique set of data. No fighting over the same seat!
Mix and Match: Want to shake things up? Use random selection so each request pulls a different combination, or sequence through the list if you’re feeling orderly.
By letting your tests “breathe” with variable data, you get a much better sense of how your APIs behave under authentic pressure, no cookie-cutter scenarios here.
Now that you know how to inject a little reality into your load testing, let's jump into the tools that make all this possible without breaking a sweat.
What is Data Parameterization (and Why Should You Care)?
Ever notice how users never behave exactly the same? Neither should your tests. Enter data parameterization, the not-so-secret sauce to leveling up your load tests.
Simply put, data parameterization means swapping out hard-coded, static test data for dynamic values that change on every test run. Instead of every virtual user logging in as "User123" with "Password123," you can have thousands of different usernames, passwords, and other variables marching through your API. This makes your tests much more realistic, and way more useful.
Why Bother With Parameterization?
Real-World Variety: Most apps don't get hammered by a single user repeating the same request. Simulate the vibrant chaos of real users with varied data.
Spot Sneaky Bugs: Some performance issues only crop up with unique data, think caching, data collisions, or authentication hiccups.
Test Edge Cases: Easily cover more scenarios, not just the boring, middle-of-the-road ones.
How to Implement Parameterization
So, how do you work this magic into your load testing scripts? Here’s a quick primer, using JavaScript-based tools like k6 as an example (though the idea applies to nearly any legit load testing tool):
Prepare Your Data: Gather up a list of test users, products, or whatever variables matter. JSON, CSV, or even a database will do.
Feed the Data to Your Script: Most tools let you read external files and load them into memory, think arrays full of different users.
Randomize or Sequence: For each virtual user or test iteration, select a unique data set. You could pick them randomly, round-robin style, or any logic that suits your scenario.
Plug Into Requests: Use these dynamic values when constructing your API calls, URL parameters, payloads, authentication, whatever floats your functional boat.
Here’s a super-simplified sketch:
Result: Your load test is doing a pretty solid impression of real users, not a clone army.
But don't worry! We're about to dive into some awesome tools that make API load testing way more manageable. Whether you're a seasoned pro or just dipping your toes into the testing waters, there's something here for everyone.
How to Validate API Responses During Load Tests
Of course, blasting your API with requests is only half the battle, you also want to make sure your app is responding correctly under all that pressure. After all, there’s not much bragging rights in surviving a traffic tsunami if your endpoints start returning weird data or cryptic error codes.
Here's how you can sanity-check your API’s behavior while the testing madness is underway:
Status Codes Matter: Track that your API is serving up the correct HTTP status codes (like consistent 200s for successful requests). A sea of 500s is a big, flashing “fix me!” sign.
Response Content Checks: Don’t just stop at the status code. Peek at the content returned. Is it the data you expect? Testing tools let you check that fields, keys, or specific values in your JSON payload actually match what’s intended.
Header Validation: Headers carry important info, like the response format. Confirming headers like
Content-Type: application/jsoncan help spot subtle issues that only show up under heavy load.Automated Checks (a.k.a. Mini Quests): Most load testing frameworks let you define checks, think of these as little gremlins poking at each response, making sure everything’s as it should be. You can set up checks to validate status codes, response fields, or even specific header values during every test run.
Aggregate Your Results: Expect a few hiccups when you crank up the load (no app is perfect, and no one's going to kick you out of the internet for a handful of failed requests). The key is staying inside your error budget or service-level objectives.
By layering these validation steps right into your load tests, you’ll quickly spot when things go sideways, long before they become a real-world headache.
Setting Clear Pass-Fail Criteria with Thresholds
Alright, so you’re pumped about running your first load test, but how do you know if your app is actually passing or failing under the pressure? That’s where setting solid pass-fail criteria comes into play, and thresholds are your trusty measuring stick.
Here’s the gist: thresholds let you define very specific success (or “oh no!”) markers for your tests. These can be Service Level Objectives (SLOs), reliability goals, or any metric that matters, like latency, error rates, or response times.
How It Works:
Define Your Metrics: First up, pinpoint what matters most for your app. For example, maybe you want 95% of your API calls to finish in under 200ms, and your error rate to stay below 1%.
Set Your Thresholds: In your testing tool (like k6, Qodex.ai, or others), you can codify these goals as actual thresholds. Think of it like telling your test, “If we cross this line, sound the alarm!”
Get Instant Feedback: As the test runs, the tool checks if your app’s performance is within those boundaries. If everything’s peachy, you’ll get happy green checkmarks. If something tips over, you’ll see clear warnings or even a non-zero exit code, perfect for making your CI/CD pipeline smack the “fail” button automatically.
Example Thresholds You Might Set:
Error Rate: Less than 1% failed requests
Latency: 95% of responses below 200ms
Data Sent/Received: Within expected ranges
With thresholds, load testing doesn’t just throw data at you, it tells a story. Did your shiny new API stay strong, or did it flinch when the firehose opened? Set those pass-fail lines, and you’ll always know the answer.
From Lone Endpoints to Complete Workflows: How Load Testing Evolves
If you're just starting out, don't feel like you need to orchestrate a blockbuster load test right away. The journey usually goes something like this:
Begin with Solo Endpoints: First, you'll want to bombard a single API endpoint, think of it as a stress test for that one door in your app. Tools like Apache Bench (ab) or Postman can give you quick insights into where the cracks in the façade might appear when the going gets tough. This is where you uncover glaring performance bottlenecks hiding in plain sight.
Move to Integrated Testing: Once your API can stand on its own, up the ante. Now, you’re hitting endpoints that interact with other parts of your system or depend on external services. Maybe it’s your authentication API calling your user database, or a payment processor swinging by a third-party service. Fun, right? The goal is to see how well those moving pieces dance (or stumble) together under pressure.
Graduate to End-to-End Flows: At this stage, you're simulating full-blown user journeys, making purchases, uploading files, logging in and getting lost in the depths of your app. Load tests here mimic actual user behavior, including those complex, multi-step workflows that matter most to your real users.
The trick? Start with the basics and gradually introduce complexity. Think of it like leveling up in a video game: nail the earlier stages before braving the boss fights. This incremental approach not only helps you identify issues faster, but prevents you from getting bogged down in mountains of spaghetti data too early.
Turning Postman Collections and OpenAPI Specs into Load Tests
If you’re dreading the idea of hand-crafting every single load test script, fear not. There are clever shortcuts that let you transform the work you’ve already done (like those painstakingly organized Postman collections or your thorough OpenAPI specs) right into load testing gold.
Here’s how you can convert your existing API definitions into load test scripts with minimal headache:
From Postman to Load Test: You can use tools that take your trusty Postman collection and automatically spin it into a basic load testing script. This way, the requests you’ve been debugging in Postman turn into the foundation for your performance tests, saving you a ton of start-up time.
From OpenAPI (Swagger) to Load Test: Got an OpenAPI (formerly Swagger) definition? Handy generators can produce a skeleton load test script based on your API's contract. This is especially useful when you want to ensure every endpoint gets put through its paces.
Once you’ve generated these scripts, you can dive in, customize the logic, and tweak the scenarios to mimic those unpredictable users we mentioned earlier. It’s a huge time-saver, especially if you’re onboarding a teammate or just want to see results fast. For best results, though, give your scripts a personal touch. A little scripting know-how goes a long way toward simulating real-world adventures (and misadventures) your API might face.
Picking the Perfect Spot: Load Generator Locations Matter
Let’s talk geography, not of your users, but of your load generators. Where you choose to run your tests can make or break your results, and here’s why:
Accuracy Counts: If you want your tests to reflect the real world, you’ll need to launch them from locations that match where your users actually live. Testing from a distant data center when your app’s audience is mostly in Paris? That skew could have you chasing the wrong performance culprits.
Consistency is Key: When your goal is to monitor trends or compare results between test runs, it’s crucial to keep load generator locations the same each time. Swapping places can scramble your latency numbers, making it tricky to track real progress.
Proximity Pitfalls: Running tests from a server sitting next to your app’s backend might make things look snappier than they’ll be for actual users scattered across the globe. For a true sense of how your API performs under pressure, pick regions that mirror where your users are, or at least avoid keeping things too cozy with your server.
Bottom line: The location of your load generators isn’t just a technical detail, it’s a big factor in how trustworthy your test results are. Take a moment to plan out your regions, and you’ll get performance insights that actually matter.
Pinpointing the Right API Components and Flows to Load Test
So, where do you start? Loading up every single corner of your API all at once might sound tempting, but it’s not exactly practical (or necessary). The key is to be strategic, target what matters most, then branch out as you get comfortable. Here’s how to zero in on what to test first:
Single, Critical Endpoints: Begin with the API endpoints that see the heaviest use or are mission-critical for your app. Think login, payment, or anything that could bring your user experience grinding to a halt if it misbehaves.
Complete User Journeys: Once you've tackled the basics, expand your sights to full user flows, like registration through checkout, to see how multiple endpoints behave together under pressure.
High-Value Integrations: Don’t skip testing endpoints that interact with third-party services or other microservices. If one piece falters, the rest can feel the ripples.
Known Bottlenecks: Have an endpoint that’s been finicky during regular testing? Or maybe you’ve seen slowdowns in production? Put those trouble spots under the microscope.
Start small, then level up:
Kick things off with straightforward tests against single endpoints. As your confidence grows, layer on more complex tests that mimic real-world scenarios, multiple users, tangled data, and unpredictable workflows. Over time, your test suite can evolve from simple to sophisticated, just like your app.
But don't worry! We're about to dive into some awesome tools that make API load testing way more manageable. Whether you're a seasoned pro or just dipping your toes into the testing waters, there's something here for everyone.
Going Beyond the Basics: Why Just Numbers Aren’t Enough
It's tempting to rely on default metrics, like response times and error rates, when running your load tests. But here’s the secret sauce for truly bulletproof APIs: go deeper and include functional checks in your tests.
Why? Because some issues only rear their ugly heads when your app is under pressure. A server might respond lightning-fast to every request, until it suddenly trips over a logic bug hiding in a rare load scenario. If your test only looks at surface-level stats, you might miss subtle failures, like incorrect data returned or silent breakdowns in business rules.
Functional checks allow you to:
Validate Real Outcomes: Make sure your API delivers the right responses, not just any response, even as traffic ramps up.
Detect Sneaky Failures: Catch those mission-critical features that might falter only during peak chaos, before your users do.
Pinpoint Problems Faster: By checking more than just performance metrics, you can spot exactly what went wrong, not just that something did.
In tools like Postman and JMeter, adding these functional validations is a breeze. They help you see the full picture, so you’re not just chasing bottlenecks, but also confirming your app works flawlessly under real-world pressure.
Taming Metric Overload from Dynamic URLs
If you've ever run a load test against endpoints with dynamic URLs, think /posts/123 or /posts/banana-phone, you've probably noticed your metrics dashboard turning into a sprawling mess. Every variation of the URL gets tracked as a separate data point, and suddenly you need a spreadsheet just to keep up. Yikes!
So, how do you wrestle those wild metrics into shape? The trick is smart URL grouping.
Instead of treating each unique URL as a snowflake, you can generalize those dynamic parts, like numbers or random strings, into a single, tidy pattern. For example, grouping everything under /posts/{id} lets you consolidate metrics for all those one-off requests under a single label. It’s like Marie Kondo-ing your performance reports, tidier, easier to analyze, and way less overwhelming.
Most modern testing tools offer a way to define these patterns, so your post-‘run’ coffee break won’t be spent drowning in a sea of nearly identical endpoints. This keeps your results focused and actionable, so you can zero in on actual bottlenecks and performance trends, rather than playing “Where’s Waldo?” with your API calls.
Demystifying SLOs: Your Performance Targets in Action
Alright, let’s talk about a little something called Service Level Objectives, or SLOs for short. Think of SLOs as the finish line you set for your API’s performance and reliability. They’re not just wishful thinking, but hard targets, like “99% of requests should finish in under 600ms” or “failed requests should make up less than 0.01%.” These aren’t just numbers to slap on a PowerPoint; they’re what separates “good enough” from “mission critical.”
How SLOs Shape Your Load Testing Game
So, how do you actually make sure your API hits these marks? Enter: load testing with intention. Instead of just blasting your API with requests and hoping for the best, you design your tests with clear pass-fail rules that map directly onto your SLOs. For example, you might say, “My test passes if 95% of requests come back in under 200ms and the error rate is practically nonexistent.” This way, you’re not just measuring for fun, you’re stress-testing with purpose.
Define Your SLOs: What matters to your users? Speed? Uptime? Identify the metrics that count.
Set Pass/Fail Criteria: Tie your load tests directly to these objectives. If your API falls short, the test fails, no sugarcoating.
Test Across Environments: Don’t just run these in a staging playground. Validate your SLOs both before launch and as your app faces real users.
Seeing It in Action
Picture running a test where you specify, say, “Keep errors under 1% and ensure almost everyone gets a lightning-fast response.” When the test wraps up, you’ll know instantly if you’re crossing the finish line, or tripping over your shoelaces. And if things go sideways, automated tools can raise a red flag so you know exactly where to start debugging.
In short: SLOs give your load testing a mission. Instead of hoping your app will keep up, you’ll know if it’s genuinely ready for the chaos of launch day.
What If Your Tool Doesn't Support Your Protocol?
Sometimes you'll find that your API load testing tool doesn't play nicely with an obscure (or bleeding-edge) protocol you need to test. Don't panic! Many tools allow you to extend their capabilities with plugins or extensions, letting you craft tests for protocols beyond the standard HTTP/REST world.
For example, if your tool doesn't support a specific protocol right out of the box, you can usually:
Browse available community-contributed plugins, popular tools like Artillery, Gatling, and JMeter have bustling plugin ecosystems.
Build your own extension or script to generate requests in your protocol of choice.
Check the official documentation for guidance on third-party integrations or scripting APIs.
Common protocols you might find supported via extensions include Avro, ZeroMQ, Ethereum, STOMP, and more. Pro tip: dig into your tool’s plugin directory or user forums, someone may have already solved the problem you're facing.
Each of these tools has its strengths and potential drawbacks. The best choice depends on your specific needs, team expertise, and budget constraints. Whether you prefer the flexibility of open-source options like Artillery and Gatling, or the robust features of commercial services like Qodex.ai and BlazeMeter, there's a tool here to fit your API load testing requirements.
How to Hit Your Target Request Rate in API Load Testing
Alright, so you want your API load test to send exactly X requests per second, or per minute, like a finely tuned espresso machine. Here’s how you pull it off without breaking a sweat (or your server):
1. Decide Your Magic Number
First, pick your target request rate. Are you expecting a steady crowd of 50 RPS (requests per second), or just a handful at peak? Knowing this number sets the stage for your load test.
2. Choose the Right Testing Mode
Most modern load testing tools, like k6, Artillery, or JMeter, let you specify the pace of your requests. Look for an option that promises a "constant arrival rate" or allows you to set a steady flow of requests. This keeps the traffic predictable and controlled, not like a random stampede at a Black Friday sale.
3. Set Iterations vs. Requests
Some tools base their tests on iterations, where one iteration can fire off one or multiple requests. If you want precision, make each iteration trigger a single request, that way, iterations per second equals requests per second. No math headaches required.
4. Dial In Your Request Rate
Plug in your request rate where your tool asks for it. For example, telling it, “Hey, give me 50 requests every second,” and letting the tool handle the orchestration.
5. Keep It Real, But Flexible
If you want to spice things up (simulating real user surges or lunchtime lulls), many load testers let you ramp things up or down gradually. Try out "ramping arrival rate" features for a traffic rollercoaster you control.
Sample Steps Recap:
Decide your desired request rate (say, 50 per second)
Configure your testing tool to use a constant arrival rate (look for settings called "rate," "constant load," or similar)
Make sure each test iteration matches one API request (for accuracy)
Start your test and watch the RPS magic happen
Pro Tip:
Tools like k6 or Artillery will usually report back your requests per second as you run the test. Sit back, sip your favorite coding beverage, and monitor if you’re hitting your numbers. If not, tweak the settings and unleash another round.
And if a constant pace isn’t enough for your wild test dreams, play around with ramping or dynamic traffic modes. The options are there, just waiting for you to push the limits.
Now that you know how to control your request rate, let’s check out some top tools that simplify the process:
How to Ramp Up (or Down) Your Request Rates
So, what if you need to turn up the heat gradually, or maybe ease off the gas, when testing your APIs? Good news: most modern load testing tools have your back.
Instead of bombarding your API with a steady stream of requests, you can simulate real-world traffic spikes and dips. This is done by configuring your tool to "ramp" the request rate:
Ramping Up: Start with a low number of requests per second and gradually increase to your desired peak. This lets you see how your system handles a growing crowd.
Ramping Down: Maybe you want to see how your app recovers as traffic subsides. You can taper off the load, mimicking quieter usage periods.
Many tools, like Apache JMeter, Artillery, or k6, offer flexible options for ramping patterns. Whether you want a linear increase, bursts, or a custom schedule, you can design the scenario that matches your biggest launch-day fears (or dreams).
Bottom line: ramping request rates gives you a realistic look at how your API handles change, not just constant pressure. That means fewer surprises and a lot more confidence when the real users flood in.
Configuring Virtual Users, Duration, and Iterations in Your Load Test
Ready to get hands-on? Setting up your load test usually comes down to three main ingredients: how many virtual users (VUs) you want to unleash, how long you want to keep the pressure on, and (if you dare) how many times you want those actions repeated.
Here’s the cheat sheet:
Virtual Users (VUs): This is your “crowd size”, tell your testing tool how many fake users you want to simulate storming your API all at once.
Duration: Want to see if your API can survive a sprint… or an all-day marathon? Set the test duration in seconds, minutes, or even hours, depending on your goals.
Iterations: Sometimes, you’re not looking for a time-based assault but instead want each user to repeat an action a precise number of times. That’s where iterations come in handy.
Most load testing tools (like Artillery, JMeter, or Qodex.ai, if you’re feeling fancy) let you tweak these knobs right in the configuration file or command line. For example, you might tell your test script: “Hey, spin up 50 virtual users and have them hammer away for 30 seconds.” Or you might get more granular and say, “Launch 20 users, and once each has completed 100 requests, call it a day.”
The golden rule? Start small, then dial up the pressure until you learn where things break. Tweak VUs, up the duration, or change the number of iterations to match your app’s real-world scenario. Before you know it, you’ll be load testing like a pro.
Meet the Constant Arrival Rate Executor: Your API’s Personal Metronome
If you want your load test to hit an exact number of requests per second, no more, no less, the constant arrival rate executor is your new best friend. Think of it as a super-consistent metronome that keeps your API requests marching in perfect time, no matter what.
How Does It Work?
Instead of tying the number of requests to the number of virtual users (which can fluctuate), this method lets you set a target, say, 50 requests per second. It then ensures requests keep firing at that steady pace throughout your test, making it easy to spot performance issues that might only appear under a precise load.
Getting Set Up is (Mostly) a Breeze
Here’s a simplified version of the process, stripped of confusing jargon and mystery:
Pick Your Pace: Decide how many requests per second (RPS) you want to simulate. For example: 50 RPS.
Match Iterations to Requests: Make sure each step (iteration) of your test matches up to one API request, unless you want to get fancy.
Dial In Your Settings: Set your test to hit your target RPS, and double-check that all your virtual users and data are ready to keep up.
Press Go: As the test runs, your tool will crank out requests at the exact rate you picked, rain or shine.
Why Bother?
Consistency is Key: If you need predictable, repeatable results, this approach delivers.
Pinpoint Problems: Since requests come in at a constant flow, it’s easier to catch subtle slowdowns or failures that might otherwise hide in the noise.
Control the Chaos: Want to simulate spikes or gradual ramps instead? Switch over to a “ramping arrival rate” for those stress-test moments.
With the constant arrival rate executor at your disposal, testing just got a whole lot more precise, and a whole lot less stressful.
When to Use "Sleep Time" in API Load Testing
Let’s talk about a little trick that can make or break your load test results: adding “sleep time.” Sleep time refers to intentionally pausing between requests your test scripts send to the API. But when does it actually make sense to use it?
Here’s the lowdown:
Simulating Real Users: If you want your tests to reflect how humans behave, think clicking around at their own pace, making coffee between tasks, or simply not being lightning-fast robots, adding sleep time is a must. Randomized short delays between requests help your test feel more like actual users are interacting with your app, rather than an automated script hammering your server.
Preventing False Failures: Send thousands of requests per second without a break, and you might only be testing how fast your test machine can go, not your API’s real-world limits. A little pause reduces pointless strain on your testing tools, ensuring you measure your API’s true performance.
Component-Level Stress Testing: If you’re isolating a specific piece of your system to see how much punishment it can take, you might skip the sleep, to turn up the heat! However, even here, sprinkling in short random delays can help avoid weird patterns and accidental spikes that don’t reflect reality.
In short, if you want your load test to mirror normal user workflows, always toss in a bit of sleep time, just like you would in a regular, manual test. It keeps things realistic, actionable, and a whole lot friendlier for your infrastructure.
So, What’s “Sleep Time” in Load Testing Anyway?
Let’s talk about a sneaky little trick in the world of load testing: “sleep time.”
In simple terms, sleep time is a deliberate pause you add between requests during a load test. Think of it as a coffee break for your virtual users, helping your test traffic behave more like actual humans (as opposed to an army of tireless robots clicking “refresh” a thousand times a second).
Why does this matter? For starters, real users don’t hammer your APIs back-to-back at lightning speed, they poke around, read, scroll, and sometimes get distracted by a cat video. By sprinkling some sleep time into your tests, you make your simulated traffic patterns way more realistic. This means your load tests are better at revealing how your app will handle crowds in the real world.
But there’s more:
Avoids “Robot Overload”: Without sleep time, the testing system itself can become the bottleneck, churning out requests faster than the real world ever could.
Prevents False Failures: A swarm of instantaneous requests might expose issues that would never actually occur, basically, problems you don’t really need to worry about.
Fine-Tunes Concurrency: Even if you’re stress-testing a single component, tossing in a few milliseconds of random sleep can help avoid accidental stampedes and skewed results.
Bottom line: adding sleep time isn’t just a technicality, it’s the secret ingredient for creating meaningful, real-world-ready load tests.
When Checks Fail: What's Normal and What's Not?
So, what if some requests in your load test start failing? Relax, total perfection is a myth, and a little bit of failure is part of the game. In fact, most teams set their Service Level Objectives (SLOs) with an allowed "error budget," usually described in terms like "three nines" (99.9% success) or "four nines" (99.99% success). The key is knowing what's acceptable for your users and business.
During a typical load test, when a check fails, say, a response code isn't what you expected, the test itself just keeps on chugging. Unlike unit tests, where a failed assertion can halt everything, load testing assumes some bumps in the road. You might run thousands (or even millions) of requests, and a few trip-ups here and there won't ruin the whole test.
The real goal? Monitor those error rates. If they're within your defined error budget, you're in good shape. If they're not, it’s time to dig into the data, find the breaking points, and make those resilience-boosting tweaks before your users ever notice.
What Happens If a k6 Load Test Fails?
When a k6 load test doesn't hit its defined thresholds, for example, if your target is 95% of requests finishing in under 50ms, but the results are slower, k6 will mark the test as failed. You'll immediately see this reflected in the command-line output: expect a non-zero exit code and a not-so-friendly "some thresholds have failed" message.
This is actually super handy for automating your load testing. A failing test means any CI/CD pipeline will recognize something is off and can halt deployments or alert the team, just like failing a unit test. Typically, the summary will highlight which metrics missed the mark (things like request duration, failure rates, or response times).
In short:
The test fails with a non-zero exit code.
You (and your automation scripts) get a clear signal that the threshold wasn't met.
The summary output points out exactly where your load scenario struggled.
This makes it easy to catch performance regressions early, before they sneak their way into production.
How k6 Reports on Threshold Results
When running a load test, k6 gives you instant feedback on whether your test results meet the thresholds you’ve defined. For each threshold, k6 uses clear pass/fail markers, think green checkmarks (✅) for success and red crosses (❌) for failure. These symbols make it easy to spot at a glance how your test performed.
In addition, if a threshold is missed, k6 doesn’t just make you hunt through output. It will:
Clearly mark the metric that failed (with a ❌).
Return a non-zero exit code, which is essential for automated systems and CI pipelines, perfect if you've built testing workflows with tools like GitHub Actions, Jenkins, or GitLab CI.
Print an error, calling out which thresholds didn’t make the cut.
So, whether your goal is to ensure 95% of API requests complete in under 200ms or to keep error rates below 1%, k6 tells you right away if you’re in the clear or need to take action.
Don't Forget Error Handling: Your Secret Stress Test Sidekick
Here’s a rookie move you’ll want to avoid: running your load tests expecting only happy-path results, while the server under pressure starts tossing errors your way. Under heavy load, APIs don’t just slow down, they can buckle, return cryptic error codes, or even crash outright. That’s when error handling in your test scripts becomes your best friend.
Why is this such a big deal? Because catching and properly dealing with errors has two major upsides:
Prevent Meltdowns in Your Test Runs: If your script isn’t handling errors and exceptions, it could just stop running the moment an API returns something unexpected. (Trust me, you don’t want your entire test to break just because the server hiccuped once.)
Get Real Insights: Proper error handling lets you see not just if things go wrong, but how your app reacts when the going gets tough. Did it respond with a helpful message? Did it recover gracefully? Or did it collapse into a fiery pit of stack traces?
To make your load tests bulletproof, make sure your scripts:
Check for status codes and expected responses after each API call.
Smoothly handle errors, like 500s or timeouts, by logging them without blowing up your test run.
Test both the best-case and worst-case scenarios, so you know your app can handle spikes and snafus.
Pro tip: Many testing frameworks (including k6, JMeter, and others) support try/catch patterns, response checks, and custom logging, so you can tailor your error handling to suit your needs.
By baking error handling right into your scripts, you’ll get a much clearer picture of how your app stands up to real-world, messy, unpredictable loads, making those test results way more valuable (and launch day a whole lot less nerve-wracking).
Virtual Users vs. Requests Per Second: What's the Real Difference?
When it comes to API load testing, you'll spot two common ways to crank up the heat: simulating virtual users and targeting a set number of requests per second. It might sound like techie jargon, but these are just two different philosophies for stress-testing your APIs.
Virtual Users:
Picture a swarm of robotic testers, each one acting like a real human using your app. Choosing the virtual users approach means you decide how many of these pseudo-humans hit your API at once (say, 50 at a time), and for how long. Each "user" runs through your programmed tasks, over and over, for a set period. It's perfect if you want to mimic real-life scenarios, like that big marketing campaign driving a predictable crowd to your app.
Pros: Great for modeling realistic user sessions and workflows.
Cons: You get whatever request rate naturally results from those sessions, which might fluctuate.
Requests Per Second:
This method isn't about how many users you have, but how busy your server gets. Here, you focus on raw throughput, delivering a relentless flow of requests, such as 100 per second, no matter who's sending them. It's less about mimicking specific users and more about bombarding your API with a predictable, controlled stream of data.
Pros: Lets you stress-test how your API handles a fixed, high load (think Black Friday traffic).
Cons: Not as reflective of real user journeys, since the pattern is more robotic.
TL;DR:
Use virtual users to see how your API holds up under scenarios that look like real-life usage patterns.
Use requests per second if you want to challenge your infrastructure with a consistent flood of traffic and measure its true breaking point.
Most modern tools, like Apache JMeter, Locust, and k6, let you switch between these styles, so you can choose the best weapon for your testing arsenal.
Top 5 API Load Testing Tools
1. Qodex.ai
Qodex.ai is a commercial web service designed for API testing and monitoring.
Key Features:
AI-powered test generation
Real-time API monitoring
Automated regression testing
Integration with popular CI/CD tools
Pros:
User-friendly interface, great for beginners
AI assistance reduces manual test writing
Comprehensive API health monitoring
Supports various API protocols
Cons:
AI suggestions might need fine-tuning for complex scenarios
2. Artillery
Artillery is an open-source command-line tool that emphasizes simplicity and power.
Key Features:
YAML-based test scripts
Support for HTTP, WebSocket, and Socket.io
Built-in support for various testing scenarios
Pros:
Easy to learn with YAML configuration
Lightweight and fast
Great for CI/CD integration
Generates detailed HTML reports
Cons:
No built-in GUI, which might deter some users
Limited to protocols it directly supports
Lack of distributed testing in the open-source version
3. Gatling
Gatling is a high-performance load testing tool built with developers in mind, especially those who love integrating tests directly into their workflows. Its Scala-based Domain Specific Language (DSL) makes it a favorite for crafting expressive, powerful test scripts that can flex to your app’s unique needs.
Key Features:
Scala-based DSL for test scenarios
Asynchronous architecture for better performance
Detailed real-time metrics and reports
Integration-friendly, built to slot right into your CI/CD pipelines
Automatically generates interactive, comprehensive performance reports
Pros:
Excellent performance, even with high concurrency
Expressive DSL for complex scenarios
Comprehensive documentation and active community
Built-in recorder for easier test creation
Strong focus on automation and continuous testing, perfect for development teams who want load testing as part of their regular build process
Cons:
Steeper learning curve due to Scala
Limited protocol support compared to some alternatives
More complex setup for distributed testing
Primarily focused on API and web application testing (not ideal for mobile)
Ideal For:
Development teams looking to embed performance testing into their CI/CD workflows, or projects that need detailed analytics and robust automation. If you’re after a tool that fits neatly into a modern dev pipeline and aren’t afraid to learn a little Scala, Gatling’s a strong contender.
4. JMeter
Apache JMeter is a powerful, open-source load testing tool that's been a go-to choice for developers since 1998. It's a Java-based application, renowned for its flexibility and robust feature set, making it a staple for both load and functional testing across a variety of web applications and APIs.
Key Features:
Multi-protocol support (HTTP, JDBC, LDAP, etc.)
Highly extensible through plugins
GUI for test plan creation and debugging
Ability to run in CLI mode for CI/CD integration
Built-in reporting and result analysis
Scripting support for advanced scenarios
Extensive plugin ecosystem for enhanced functionality
Pros:
Completely free and open-source
Huge community and extensive documentation
Flexible and customizable with a wide range of plugins
Can simulate heavy loads on various types of servers
Supports distributed testing for large-scale scenarios
Versatile, handles everything from simple API checks to complex end-to-end workflows
Cons:
Java-based, which can be resource-intensive
GUI can feel dated and overwhelming for newcomers
Steeper learning curve compared to some modern tools
Setting up complex scenarios can be time-consuming
Ideal Use Cases:
Teams seeking an all-in-one tool for both load and functional API testing
Projects requiring a flexible, extensible solution that grows with evolving testing needs
Anyone who loves a robust community (and the occasional rabbit hole in documentation)
If you're looking for a tried-and-true load testing solution with a Swiss Army knife approach to APIs and web apps, JMeter is hard to beat, just be prepared for a bit of a learning curve, especially if you're new to the world of load testing.
5. BlazeMeter
BlazeMeter is a commercial Platform-as-a-Service (PaaS) that's compatible with JMeter.
Key Features:
Cloud-based testing with global distribution
Integration with CI/CD tools
Advanced reporting and analytics
Support for various testing types (functional, performance, API)
Open-source compatibility, allowing you to run existing JMeter scripts seamlessly
Detailed analytics for deeper performance insights
Pros:
Easy scaling for large tests
Familiar interface for JMeter users
Comprehensive test management features
Strong integration capabilities
User-friendly interface for creating and managing tests
Flexible plans, including a free tier for getting started
Cons:
Can be expensive for larger scale testing
Some advanced features limited to higher-tier plans
Steeper learning curve for those new to JMeter concepts
While it offers a free plan, advanced features often require a subscription
May be pricier than open-source solutions when testing at enterprise scale
BlazeMeter’s cloud-based approach means you don’t need to worry about maintaining your own infrastructure, and its compatibility with open-source tools like JMeter makes it a strong bridge between robust enterprise features and familiar open-source workflows. Whether you’re running a quick proof of concept or scaling up for a global load test, BlazeMeter’s mix of usability, scalability, and analytics makes it a standout choice for many teams.
6. Locust.io
Locust.io is another open-source option that stands out for its flexibility, if you know your way around Python, this tool gives you near-limitless control over your load tests.
Key Features:
Write your test scenarios directly in Python, making it incredibly customizable for those who enjoy scripting.
Distributed testing made simple, spin up swarms of distributed workers to throw millions of virtual users at your API.
Comes with a handy web-based UI for monitoring your swarm in real time (or run it headless for CI/CD nerds).
Pros:
Totally free, open-source, and runs wherever Python runs.
Perfect for simulating just about any complex user or system interaction you can cook up in code.
Scales up beautifully, you can pound your APIs with vast hoards of traffic thanks to its distributed swarm architecture.
Cons:
Not the friendliest for non-programmers; Python knowledge is a must.
Doesn't do browser-based testing out of the box, it's focused on APIs and protocol-level interactions.
Best For:
Dev teams fluent in Python who want to craft highly specific and programmable load tests.
Projects that demand large-scale, distributed simulations, think tens of thousands (or more!) of virtual users hammering your endpoints.
Loader.io
Loader.io brings effortless cloud-based API load testing to the table, focusing on simplicity and ease of use.
Key Features:
Instantly scalable, cloud-driven testing, no hardware setup or network wizardry required.
Incredibly quick to get started: upload your target URLs, set your test parameters, and you’re rolling in seconds.
Real-time charts and visual feedback make it easy to spot bottlenecks as they happen.
Pros:
Minimal configuration means no time wasted wrangling settings, great for fast feedback loops.
The UI is clean and self-explanatory, making this tool friendly for developers of any experience level.
Includes a free plan, providing a gentle entry point for side projects and small teams.
Cons:
The free tier comes with significant restrictions on test size and duration, so you may outgrow it quickly.
Advanced features like detailed request customization and deep-dive analysis aren’t as robust as pricier alternatives.
Custom test logic and scripting are limited, making it less suitable for highly complex scenarios.
Ideal Use Cases:
When you need a lightweight, on-demand solution to sanity-check your API’s scalability.
For smaller teams or early-stage projects that don’t require intricate scripting or distributed environments.
If your goal is to get usable results within minutes, without a learning curve or investment in infrastructure.
Each of these tools has its strengths and potential drawbacks. The best choice depends on your specific needs, team expertise, and budget constraints. Whether you prefer the flexibility of open-source options like Artillery and Gatling, or the robust features of commercial services like Qodex.ai and BlazeMeter, there's a tool here to fit your API load testing requirements.
8. LoadView
LoadView takes a unique approach by simulating API load through real browsers in the cloud. This means you’re not just testing your backend APIs in isolation, you’re seeing how those APIs hold up under pressure when actual user interactions occur, including clicks, form fills, shopping carts, and more.
Key Features:
True real-browser simulation for authentic user interaction testing
Customizable scripting options to mimic complex, real-world workflows
Supports integrations with Selenium, JMeter, and Postman
Fully cloud-based, so you can scale tests without wrangling on-prem infrastructure
Pros:
Delivers deep visibility into how your APIs and front-end work together under load
Scripting flexibility allows you to design highly tailored test scenarios
Integrates smoothly with popular frameworks and tools for end-to-end test coverage
Cons:
Because it runs tests in real browsers, resource usage, and pricing, can be higher than some alternatives
Teams new to scripting browser-based tests may face a learning curve
Ideal For:
Teams focused on the full user journey, including UI responsiveness and end-to-end performance
Projects where understanding both API and front-end behavior under stress is a top priority
Organizations aiming to add powerful load testing to an automated testing pipeline for comprehensive coverage
9. K6
K6 is a modern, open-source load testing tool beloved by developers for its JavaScript-based scripting and strong cloud capabilities.
Key Features:
Script load tests in JavaScript, making it approachable for anyone comfortable with web dev
Flexible test execution: run scripts locally, in your CI pipeline, or through the K6 cloud for global scale
Simulate traffic from 21+ locations to better mirror real-world usage
Supports far more than basic load testing (think: end-to-end, infrastructure, and regression tests)
Integrates smoothly with dev favorites like VS Code, Postman, and Grafana dashboards
Pros:
Easy ramp-up for teams familiar with JavaScript
Both local and cloud options, test on your laptop or scale up when you need
Active open-source community and stacks of plugins/extensions
Visualize and analyze results live in Grafana for extra credibility with the boss
Cons:
Requires some JavaScript know-how, which could slow down purely non-coding testers
Cloud testing adds powerful scaling but can bump up costs, especially for frequent or massive test suites
Ideal For:
Teams that want powerful, automated load tests woven right into their CI/CD workflows
Projects demanding realistic, globally distributed testing scenarios
Developers who prefer flexibility and deep scripting control over a drag-and-drop interface
Postman
Postman has earned a reputation as the Swiss Army knife of API development, packing design, testing, and documentation tools all under one roof. But beyond its well-known collaboration superpowers, Postman also moonlights as a platform for API load and performance testing.
Key Features:
Sleek interface that streamlines API design, exploration, and testing
Built-in tools for simulating various load and stress scenarios
Real-time collaboration features for teams (commenting, shared workspaces, etc.)
AI-powered scripting with Postbot to quickly generate test scripts from prompts
Pros:
All-in-one platform, ideal if you want everything in one toolkit, from API definitions to monitoring
Supports team collaboration, making it easy to work together across the entire API lifecycle
Generous free plan for individuals and small teams to get started without cost
Automated test creation helps newbies spin up test scripts faster
Cons:
Load testing capabilities, while handy, aren’t as deep or configurable as those found in dedicated performance testing tools
The mountain of features can be a double-edged sword, newcomers might need a map to navigate it all
Ideal For:
Teams that want to develop, document, and lightly load test APIs all in one place
Projects where seamless collaboration from design through testing is a must-have
Smaller scale performance testing, like checking how new endpoints handle extra requests, rather than simulating full-scale production traffic
If you’re looking for an approachable entry-point to API load testing, plus a whole lot more, Postman is worth a try. Just know, for real high-traffic stress testing, you might eventually need to graduate to more specialized tools.
11. LoadNinja
LoadNinja steps onto the scene as a paid load testing tool specializing in browser-based tests. While it leans more toward web application performance, it brings some unique advantages to the table for teams wanting to see how their APIs fare under the hood of real browsers.
Key Features:
InstaPlay Recorder: Record your clicks and actions right in the browser, no scripting gymnastics required. Just hit record, interact with your app, and LoadNinja generates the load test scripts for you.
Real Browser Load: Unlike most load-testing tools that simulate requests, LoadNinja runs tests with actual browsers. This exposes how APIs perform when real users interact with your app at scale.
Actionable Reports: Instantly see navigation timings, network data, and where things slow down. Reports are built for humans, not just performance engineers.
Pros:
Fast-tracks load test creation, say goodbye to tedious manual scripting.
Provides a reality check on user experience by leveraging real browsers, making results much closer to what end-users actually see.
Delivers granular performance details so you can pinpoint exactly where bottlenecks lurk.
Cons:
Eats up more resources since it spins up real browsers (think of it as trying to host a stadium event vs. Sending out invitations by email).
Strictly pay-to-play, there’s no free tier, so it may not be ideal for smaller teams or side projects.
Ideal Use Cases:
Great for teams who care deeply about how users experience their apps, especially with dynamic or complex web flows.
Perfect when you need the full picture of end-to-end performance, particularly if your API's "real world" stress is tied to browser actions.
Best suited to organizations aiming to slash time spent on script maintenance, while still digging deep into performance insights.
Each of these tools has its strengths and potential drawbacks. The best choice depends on your specific needs, team expertise, and budget constraints. Whether you prefer the flexibility of open-source options like Artillery and Gatling, or the robust features of commercial services like Qodex.ai and BlazeMeter, there's a tool here to fit your API load testing requirements.
When evaluating your options, consider factors such as:
Scripting Language Support: Some tools let you write test scripts in popular languages like JavaScript, making it easier for developers to get started and customize scenarios.
Cloud Capabilities and Global Reach: Cloud-based solutions offer scalable testing environments and can run tests from multiple load zones worldwide, ideal for simulating real-world, geographically distributed traffic.
Versatile Testing Functions: Beyond load testing, many platforms support end-to-end web, infrastructure, and regression testing, allowing you to cover more ground with a single tool.
Integrations and Workflow Efficiency: Seamless integrations with developer tools like VS Code, Postman, and Grafana can streamline your testing workflow and reporting process.
Community and Support: Open-source projects often benefit from active communities, plugin ecosystems, and peer support, while commercial tools may offer dedicated assistance and advanced analytics.
That said, keep in mind that some solutions may require a certain level of programming knowledge, especially those that use scripting for test creation. Cloud-based services deliver scalability but might introduce additional costs compared to purely open-source alternatives.
Ultimately, consider your team's preferred workflow, the complexity of your testing requirements, and how deeply you want to integrate load testing into your CI/CD pipeline. This will help you zero in on the tool that fits both your immediate goals and your long-term development practices.
Ideal Use Cases at a Glance
Scalability & Flexibility: Development teams needing to scale tests across multiple global locations or integrate load testing into DevOps and CI/CD pipelines will find solutions tailored for those needs.
User Experience Focus: For projects where understanding end-to-end performance or optimizing for real user flows is vital, some tools excel at simulating intricate scenarios and surfacing actionable insights.
Integrated API Lifecycle: Teams seeking a unified environment for API design, testing, and documentation can leverage platforms that streamline collaboration throughout the API lifecycle.
UI Performance Insights: When detailed user interaction data and UI performance under load are priorities, look for tools offering comprehensive analytics and seamless integration with broader testing suites.
Quick & Cost-Effective Cloud Testing: Projects that require rapid scalability assessments without heavy setup can benefit from straightforward, cloud-based solutions.
Customizability for Python Proficiency: Large-scale projects demanding high customization, especially for Python-savvy teams, will appreciate tools built with scalability and flexibility in mind.
CI/CD Integration: For organizations embedding performance testing into continuous workflows, options with robust analytics and reporting stand out.
All-in-One Versatility: If you need a tool that adapts to a wide variety of testing scenarios, not just load, some platforms offer comprehensive coverage across testing types.
By matching your project’s priorities to these use cases, you can narrow down the best fit and ensure your load testing process is both efficient and effective.
Conclusion
As we've seen, the world of API load testing is rich with options, each bringing its own strengths to the table. From JMeter's versatility to Qodex.ai's AI-powered efficiency, there's a tool out there to match your needs and skill level.
Remember, the best tool is the one that fits seamlessly into your workflow and helps you catch performance issues before they become real-world headaches. Whether you're a solo developer or part of a large team, investing time in load testing will pay off in smoother launches and happier users.