REST Assured: A Complete Guide to API Test Automation
Ever wondered how companies ensure their APIs work flawlessly? Enter REST Assured, your go-to solution for API testing in Java. Think of REST Assured as your personal API detective – it methodically checks every request and response, making sure your APIs perform exactly as they should.
If you would rather not hand-write and maintain REST Assured suites, the Qodex API testing platform authors the API scenarios for you and replays them deterministically.
Let's break it down: REST Assured acts like an invisible middleman between your test code and your API. It's designed to speak the language of web services, handling all those complex HTTP requests and responses so you don't have to. What makes REST Assured so versatile? It supports a full range of HTTP methods, including GET, POST, PUT, DELETE, OPTIONS, PATCH, and HEAD. Whether you're fetching data, sending updates, or cleaning up test users, REST Assured provides the tools you need to interact with your API just like a real client would.
Whether you're checking if your API correctly adds a new user or retrieves the right data, REST Assured has got your back.
Understanding the Client-Server Model
Before diving deeper, let's quickly recap how APIs work under the hood. At its core, API testing happens within the client-server architecture, think of your test code (the client) sending requests to the API (the server). The client asks for information or actions, and the server responds accordingly. This is all orchestrated using the HTTP protocol, the common language of the web.
HTTP Requests and Responses
When you use REST Assured, you're essentially crafting HTTP requests, like GET, POST, PUT, or DELETE, to interact with your API. The server then replies with an HTTP response, delivering status codes, data, or error messages. REST Assured handles all this for you, making sure your tests can focus on verifying the actual behavior of your API instead of getting bogged down in the technical details.
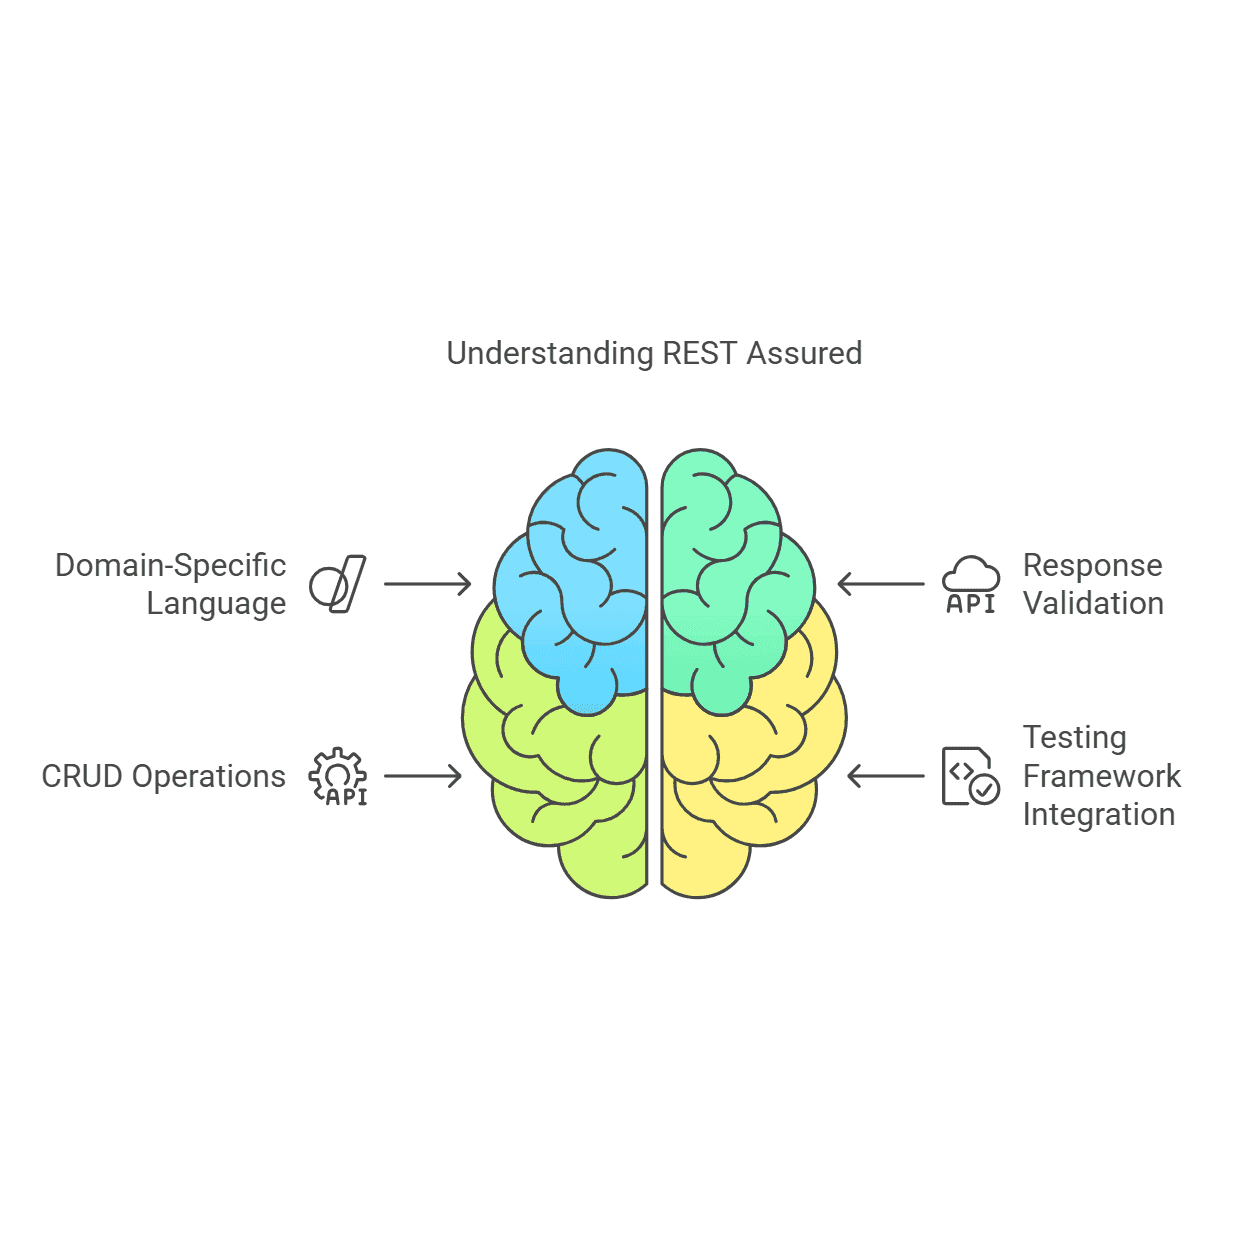
But what makes REST Assured such a popular choice among developers and QA engineers? For starters, it offers a straightforward and efficient way to test and validate your REST APIs, crucial for making sure your endpoints deliver the right results and gracefully handle errors. REST Assured comes packed with a user-friendly DSL (domain-specific language) that lets you write expressive, readable tests without a mountain of boilerplate code.
You can work with various HTTP methods, perform validations on responses, and even adopt the BDD (Behavior-Driven Development) Given/When/Then syntax to make your tests as clear as a well-written recipe. The best part? REST Assured is open source, meaning it’s constantly evolving and you can tap into a vibrant community for support and contributions.
In a nutshell, REST Assured streamlines API testing, making it accessible for beginners and powerful enough for seasoned pros. Whether you're building a microservice architecture or managing a sprawling enterprise system, it's a tool you’ll want in your testing toolkit.
Why REST Assured Makes API Testing a Breeze
At its core, REST Assured is an open-source Java library that lets you write comprehensive API tests with minimal code. It was built to make Java API testing as smooth and readable as scripting languages like Ruby or Groovy, so you don’t have to wrestle with low-level HTTP code.
REST Assured supports all the major HTTP methods, GET, POST, PUT, DELETE, OPTIONS, PATCH, and HEAD, giving you the flexibility to test almost any endpoint you throw at it. And thanks to its intuitive domain-specific language (DSL), you can whip up powerful, readable tests that both developers and testers can understand at a glance.
Want to validate status codes, headers, response bodies, or cookies? REST Assured has you covered with a rich set of assertions and commands. Plus, if you’re into behavior-driven development (BDD), it plays nicely with frameworks like Serenity, making it easy to integrate into your existing automation workflows.
In short, REST Assured takes the grunt work out of testing RESTful APIs, so you can focus on what matters: building reliable, robust applications.
Cracking the Code: What Is REST?
Before you dive headfirst into REST Assured, it's worth taking a minute to understand what "REST" actually means. REST stands for Representational State Transfer, think of it as a set of ground rules that make web services understandable not just for machines, but for us humans too. At its core, REST is all about easy-to-follow, predictable interactions between computers over the web.
The Building Blocks of REST
Imagine REST as a recipe, with a handful of key ingredients:
Statelessness: Each request from a client contains all the information needed, so the server doesn’t have to remember anything from previous visits, no awkward small talk required.
Client-Server Architecture: The client (you and your test code) and the server (the API) keep their responsibilities separate, so each can evolve independently.
Uniform Interface: Consistency is the name of the game; RESTful APIs expose predictable URLs, use standard HTTP methods like GET, POST, PUT, and DELETE, and follow structured responses, no guessing games.
Cacheability: Efficiency matters! REST allows responses to be cacheable, minimizing unnecessary traffic.
Layered System: Requests and responses can pass through multiple layers (like gateways or load balancers), but the client doesn’t need to know the details.
These principles aren’t just tech jargon, they lay the groundwork for building and testing APIs that are robust, flexible, and easy to work with.
Setting Up Eclipse for REST Assured
If you’re using Eclipse as your IDE, configuring it for REST Assured is a breeze. You’ll want to start by making sure that you have the latest version of Eclipse installed, along with a compatible version of Java (Java 8 or higher is generally recommended for smooth sailing).
Next, set up your project as a Maven or Gradle project, this makes dependency management much simpler. For Maven users, navigate to the "File" menu, select "New" > "Maven Project," and follow the prompts to create a new project.
Once your project is ready, head to the pom.xml file. Here, you’ll add the REST Assured dependency (along with any additional libraries for testing, like TestNG or JUnit) to pull in everything you need automatically. If you’re more of a Gradle fan, just update your build.gradle with the necessary REST Assured entries.
As a quick recap, here’s what you’ll need to do:
Ensure you have Eclipse and Java (8 or above) installed.
Start a Maven or Gradle project in Eclipse.
Add REST Assured and your preferred testing framework to your dependencies.
With these steps, Eclipse is all set to help you write, organize, and execute REST Assured tests efficiently.
Understanding Client-Server Architecture
At the heart of API testing lies the concept of client-server architecture. Imagine your computer (the client) and a powerful machine in the cloud (the server) having a structured conversation. The client sends a request, like asking for your latest account balance, and the server responds with the appropriate information.
This model powers much of the internet, from streaming your favorite cat videos to retrieving data for complex enterprise apps. APIs are the messengers facilitating these interactions. When you run tests with REST Assured, you're essentially simulating the client, sending requests to the server and closely inspecting every reply.
By understanding this back-and-forth, you can catch issues where data gets lost in translation, or requests don’t return the answers you expect. REST Assured steps in to ensure both sides of the conversation are crystal clear and error-free.
Understanding API Documentation
What exactly is API documentation, and why is it so important? Picture it as the instruction manual for your API, a clear, detailed guide that explains what your API offers, how to interact with its different features, and what you can expect in response.
Good API documentation typically includes:
Descriptions of each available endpoint
Instructions on request structure and required parameters
Examples of both successful and error responses
Authentication methods
Helpful code snippets to get you started quickly
Think of tools like Swagger and Postman. Their documentation makes it much easier for developers to integrate APIs smoothly into their applications. Without thorough, up-to-date documentation, even the best APIs become frustrating puzzles, leaving developers guessing and potentially leading to costly mistakes.
By investing time in comprehensive API documentation, you set everyone up for success: smoother integrations, faster debugging, and far fewer emails full of desperate questions.
Getting Started with REST Assured
Setting up REST Assured requires careful attention to your development environment. Let's walk through everything you need to get REST Assured running smoothly on your system.
First things first, you'll want to ensure your development environment is properly configured. REST Assured relies on specific tools and frameworks to function effectively:

Once you have these prerequisites in place, you'll need to add REST Assured to your project. Here's the Maven dependency you'll want to include in your POM file:
xml
<dependency>
    <groupId>io.rest-assured</groupId>
    <artifactId>rest-assured</artifactId>
    <version>4.4.0</version>
    <scope>test</scope>
</dependency>
After adding the dependency, REST Assured will be ready to use in your test classes. You can verify your setup by writing a simple test:
java
import io.restassured.RestAssured;
import org.testng.annotations.Test;
public class SimpleTest {
    @Test
    public void basicTest() {
        RestAssured.given()
            .when()
                .get("https://api.example.com")
            .then()
                .statusCode(200);
    }
}
With this foundation in place, you're all set to start exploring REST Assured's powerful testing capabilities. Remember to keep your dependencies updated to access the latest features and security patches that REST Assured offers.
Core Components of REST Assured
Understanding the core components of REST Assured helps you build robust API tests. Let's dive into how REST Assured handles different HTTP methods and validation techniques.
HTTP Methods in REST Assured
REST Assured supports all standard HTTP methods, making it versatile for different testing scenarios:

Response Validation
REST Assured shines in its response validation capabilities. Here's a typical validation flow:
java
RestAssured.given()
    .when()
        .get("/api/users")
    .then()
        .statusCode(200)
        .time(lessThan(2000L))  // Response time in milliseconds
        .header("Content-Type", "application/json")
        .body("name", equalTo("John"));
Status Code and Header Management
Response validation in REST Assured involves checking multiple components:

Response validation in REST Assured involves checking multiple components:These components work together in REST Assured to ensure your APIs function correctly and meet performance requirements. Remember to include appropriate assertions for each component based on your testing needs.
By mastering these core components, you'll be able to create comprehensive API tests that verify both functionality and performance using REST Assured's intuitive syntax.
Sending PUT and DELETE Requests with REST Assured
Just as REST Assured makes GET and POST requests effortless, it also streamlines handling PUT and DELETE operations. These methods are essential when you want to update or remove resources via your API.
PUT Request Example
A PUT request is ideal for updating an existing user or resource. Here’s how you can send a PUT request with REST Assured:
This example updates the user with ID 1, setting a new name and role. REST Assured makes it straightforward to send the updated payload and check the response in one smooth flow.
DELETE Request Example
Need to remove a user or resource? REST Assured makes DELETE requests just as intuitive:
You simply specify the resource you want to delete, and REST Assured handles the rest. It’s as precise and efficient as clearing out old files from your downloads folder, only you’re working with APIs instead.
By mastering PUT and DELETE, you’ll cover all the CRUD operations (Create, Read, Update, Delete), making your API tests comprehensive and rock solid.
PUT vs. POST: What's the Difference?
When putting REST Assured to work, you'll often encounter PUT and POST requests. Both are used to send data to your API, but they serve slightly different purposes, much like updating a user’s details versus adding a new user altogether.
Here's how they stack up:
POST is generally used to create new resources. Think of it as filling out a form to add a new contact to your phone, you don’t know their unique ID yet, so your API assigns one behind the scenes.
PUT, on the other hand, is designed for updating existing resources. It expects you to know exactly which resource you want to update (typically by specifying an ID in the URL). PUT overwrites the whole resource, so if you leave out fields, they might get wiped clean.
To make it crystal clear:
POST at
/api/usersmight create a brand new user and return their newly minted ID.PUT at
/api/users/42would completely replace the user with ID 42 with whatever data you provide, so be thorough.
Key differences:
Idempotence: PUT requests are idempotent, calling them multiple times with the same data produces the same result. POST isn’t; multiple identical POSTs could create multiple users.
Use case: POST for creation, PUT for full replacement or update.
Understanding when to use each one helps keep your API predictable and avoids any unexpected surprises in your tests.
BDD Syntax Structure in REST Assured
The beauty of REST Assured lies in its intuitive Behavior-Driven Development (BDD) syntax. Let's explore how this structured approach makes API testing more readable and maintainable.
Understanding the Flow
REST Assured uses a natural language chain that mirrors how we think about testing:
java
RestAssured.given()
    .header("Authorization", "Bearer token123")
    .contentType("application/json")
.when()
    .post("/api/users")
.then()
    .statusCode(201)
    .body("message", equalTo("User created"));
Practical REST Assured Examples
REST Assured is designed to support a variety of HTTP request methods, making it a go-to choice for comprehensive API testing. Below are hands-on examples for the most common HTTP methods, each following the familiar BDD pattern.
GET Request Example
Retrieve user details with a simple GET request:
POST Request Example
Create a new user using a POST request:
PUT Request Example
Update an existing user's information with a PUT request:
DELETE Request Example
Remove a user from the system with a DELETE request:
Using Cucumber for REST API Testing
Behavior-Driven Development (BDD) tools like Cucumber team up smoothly with REST Assured to take API testing to the next level, by making tests human-readable and highly maintainable.
Why Use Cucumber?
Cucumber lets you define your API test scenarios in plain English using the Gherkin syntax. This bridges the gap between technical and non-technical team members, think QA engineers, developers, and product owners, so everyone can write, review, and understand test cases.
How It Works
Here’s a quick breakdown of how you can integrate Cucumber with REST Assured:
Define API Features: Write your acceptance criteria as Gherkin scenarios in
.featurefiles. These describe the expected API behavior (e.g., "Given a valid user payload, when I POST to /users, then I get a 201 status").Step Definitions: Implement these scenarios in Java step definition files, using REST Assured under the hood to make requests and validate responses.
Test Context & Data Sharing: Share variables and responses between steps using Cucumber’s
ScenarioContextor dependency injection, enabling complex, multi-step workflows within a single scenario.Reusable Components: Refactor common operations (like setting headers or parsing responses as POJOs) into hooks or utility classes that all scenarios can leverage.
Sample Workflow
Here’s how a test workflow using Cucumber might look:
Create a Gherkin scenario describing your API behavior.
Implement step definitions to send HTTP requests with REST Assured.
Assert the API responses and status codes, just as you’d do in standalone REST Assured tests.
Organize your code for readability and reuse, shared contexts, configuration readers, and route definitions go a long way.
By combining Cucumber’s expressiveness with REST Assured’s API testing muscle, you get transparent, maintainable REST API tests that are easy to scale across your team.
The Three Pillars of REST Assured

Practical Implementation
Here's how each component works in REST Assured:
given() - The Setup Phase
java
RestAssured.given()
    .baseUri("https://api.example.com")
    .header("Content-Type", "application/json")
    .body({"name": "John", "role": "developer"});
when() - The Action Phase
java
.when()
    .post("/users");
then() - The Verification Phase
java
.then()
    .statusCode(201)
    .body("success", equalTo(true));
This structured approach in REST Assured makes your tests not only easy to write but also simple to maintain and understand. Each section clearly indicates its purpose, making debugging and modifications straightforward.
Remember, while REST Assured follows this BDD pattern, you can be flexible with how you use it based on your testing needs. The key is maintaining readability while ensuring thorough API testing.
Implementation Steps for REST Assured
Let's walk through setting up your first REST Assured project. I'll break down each step to ensure you're ready to start testing APIs effectively.
Creating Your First Project
Setting up a REST Assured project is straightforward. Here's a quick guide to get you started:
1. Maven Project Creation
xml
<project>
    <groupId>com.apitest</groupId>
    <artifactId>rest-assured-demo</artifactId>
    <version>1.0-SNAPSHOT</version>
</project>
Essential Dependencies
Your POM file needs these key dependencies for REST Assured:

Here's a complete dependency setup:
xml
<dependencies>
    <!-- REST Assured -->
    <dependency>
        <groupId>io.rest-assured</groupId>
        <artifactId>rest-assured</artifactId>
        <version>4.4.0</version>
        <scope>test</scope>
    </dependency>
<!-- TestNG -->
<dependency>
<groupId>org.testng</groupId>
<artifactId>testng</artifactId>
<version>7.4.0</version>
<scope>test</scope>
</dependency>
</dependencies>
Basic Configuration
Once your dependencies are set, configure REST Assured with these essential settings:
java
public class BaseTest {
    @BeforeClass
    public void setup() {
        RestAssured.baseURI = "https://api.example.com";
        RestAssured.basePath = "/api/v1";
        RestAssured.enableLoggingOfRequestAndResponseIfValidationFails();
    }
}
This setup provides a foundation for all your REST Assured tests. By extending the BaseTest class, your test classes will inherit these configurations, making your testing process more efficient and organized.
Remember to customize the baseURI and basePath according to your API's requirements. With this setup complete, you're ready to start writing your first REST Assured test cases.
Implementing a Configuration Reader for Test Settings
Managing your API test settings efficiently is essential for both flexibility and maintainability. Instead of hardcoding environment details, endpoints, or authentication tokens directly into your test classes, you can centralize them using a configuration reader. This approach streamlines updates, reduces duplication, and makes your framework adaptable to different environments.
How to Set Up a Configuration Reader
Here's a simple, robust way to implement a configuration reader in your REST Assured framework:
Create a Properties File
Start by creating aconfig.propertiesfile at the root of your project. Populate it with key-value pairs for your configurable settings:Build a Java Configuration Utility
Implement a helper class, for example,ConfigReader, that loads these properties:Use in Your Tests
Replace hardcoded values by referencing the configuration reader. For instance, in your BaseTest class:
Benefits of This Approach
Environment Flexibility:
Easily switch between dev, staging, and production by maintaining environment-specific config files.Secure Credential Handling:
Store sensitive details (like API tokens) outside your source code and exclude properties files from version control using.gitignore.Centralized Management:
Reduce errors and speed up changes by managing settings in one place.
By taking these steps, you build a foundation that keeps your REST Assured tests clean, maintainable, and scalable, no matter how your testing needs evolve.
REST API Testing Framework Essentials
To build a solid automation setup, consider these REST API testing framework essentials:
API Documentation: Always keep your documentation handy. It acts as the contract between your tests and the API.
Framework Structure: Organize your tests and API services separately for better maintainability.
Test Layer & API Layer Separation: Isolate your test logic from API service classes for clear, modular code.
Request & Response Conversion: Use POJOs (Plain Old Java Objects) to convert JSON bodies for requests and responses, making your tests type-safe and easier to manage.
REST Routes Implementation: Define routes centrally to avoid repetition and typos.
Generics Usage: Leverage generics in your API framework to handle various data types with less code duplication.
Refactor Headers: Centralize request header logic for consistency.
Test & Scenario Context Sharing: Share context between tests or scenarios to keep your test suites scalable.
Configuration Management: Implement a configuration reader to manage environment variables, endpoints, and credentials efficiently.
These best practices will help keep your REST Assured framework clean, scalable, and maintainable as your test suites grow.
Separating the Test Layer from API Services
A well-architected API test framework benefits greatly from separating the test layer (where test logic and scenarios reside) from the API services layer (which handles HTTP requests, route definitions, and service interactions). This separation enhances maintainability, scalability, and readability across your projects.
Why Separate the Layers?
By decoupling these layers, you can:
Reuse common service calls across multiple tests.
Isolate test logic from business logic for easier debugging and updates.
Enable parallel development, testers can focus on writing scenarios while developers refine API service methods.
How to Achieve This Separation
Create an API Services Layer:
Build dedicated classes or modules for individual endpoints. For example, aUserServiceclass might contain all methods related to user operations (create, update, delete, fetch).Encapsulate Request Logic:
Keep all HTTP request setup, such as path parameters, request bodies, authentication, and headers, within these service classes. This prevents repetition and centralizes changes.Craft Distinct Test Layers:
Write your test cases in separate classes or packages, referencing the API service methods as needed. The test layer handles assertions, input data variations, and scenario logic without concern for low-level HTTP details.Use Data Transport Objects (DTOs):
Structure request and response data using POJOs (Plain Old Java Objects) or equivalent constructs. This makes it easy to map API responses and requests, reducing serialization and deserialization hassle.
Example Structure
By organizing your framework this way, you streamline collaboration, speed up test development, and improve the longevity of your suite. This modular approach is particularly valued in mature API testing setups, such as those utilizing REST Assured, TestNG, or JUnit, where maintaining clean separation drives robust, scalable automation.
With your test and service layers distinct, advancing into more complex scenarios or introducing new endpoints becomes a straightforward process.
Authentication Handling
In RESTful APIs, two key concepts ensure your requests are both secure and tailored to the right users: authentication and authorization. It’s easy to mix the two up, but let’s clarify:
Authentication is about verifying who you are.
Authorization is about determining what you’re allowed to do after you’ve proven your identity.
Understanding this distinction helps you design tests that not only log in correctly, but also access only the endpoints and data permitted for that user.
REST Assured provides multiple authentication methods:
Basic Auth transmits credentials as a base64-encoded string and is best used with HTTPS.
OAuth 2.0 is a robust, industry-standard protocol for authentication (think of logging in with Google or GitHub).
API Key authentication involves sending a secret key in a header, often seen in public APIs.
By understanding these components, you can create well-structured and secure requests in REST Assured. Remember to choose the appropriate configuration based on your API's requirements and security needs.
When building your test scenarios, always consider which authentication and authorization strategies the API expects. Secure endpoints may require more advanced flows (like refreshing tokens), while public endpoints might only need an API key. Tailoring your approach ensures your automated tests remain both effective and secure.
Request Components in REST Assured
Understanding how to structure your requests in REST Assured is crucial for effective API testing. Let's break down each component and see how they work together.
URI Structure
REST Assured uses a clear URI hierarchy:
java
RestAssured.given()
    .baseUri("https://api.example.com")    // Base
    .basePath("/users")                    // Resource
    .pathParam("id", "123")                // Path
    .queryParam("status", "active")        // Query
    .get("/{id}");
Headers Configuration
Configure headers in REST Assured to handle different content types and authentication:
java
RestAssured.given()
    .header("Content-Type", "application/json")
    .header("Accept", "application/json")
    .header("Authorization", "Bearer " + token)
Request Body Formats
REST Assured supports various request body formats:
java
// JSON Body
RestAssured.given()
    .contentType(ContentType.JSON)
    .body({
        "name": "John",
        "role": "developer"
    })
// Form Data
RestAssured.given()
    .contentType(ContentType.URLENC)
    .formParam("username", "john")
    .formParam("password", "secret")
Authentication Handling
REST Assured provides multiple authentication methods:
java
// Basic Auth
RestAssured.given()
    .auth()
    .basic("username", "password")
// OAuth 2.0
RestAssured.given()
    .auth()
    .oauth2("your-oauth-token")
// API Key
RestAssured.given()
    .header("X-API-Key", "your-api-key")
By understanding these components, you can create well-structured and secure requests in REST Assured. Remember to choose the appropriate configuration based on your API's requirements and security needs.
Response Handling in REST Assured
Mastering response handling in REST Assured is essential for robust API testing. Let's explore how to effectively validate responses and handle different scenarios.
Status Code Validation
Here's a comprehensive approach to status code verification in REST Assured:
java
RestAssured.given()
    .when()
        .get("/api/users")
    .then()
        .assertThat()
        .statusCode(200)
        .log().ifError();
Common Response Scenarios

Response Body Validation
REST Assured offers multiple ways to validate response content:
java
RestAssured.given()
    .when()
        .get("/api/users/1")
    .then()
        .body("name", equalTo("John"))
        .body("email", containsString("@"))
        .body("roles.size()", greaterThan(0))
Converting JSON Bodies to POJOs
When interacting with APIs, it's common to translate between JSON data and Java objects (POJOs) for easier test assertions and data manipulation. REST Assured integrates smoothly with popular libraries like Jackson and Gson to handle these conversions seamlessly.
Deserializing JSON Responses
To convert a JSON response body to a POJO, ensure you have a corresponding Java class that matches the JSON structure. For example, suppose your API returns a user object:
You can then deserialize the response as follows:
This approach leverages Jackson (by default), but you can configure Gson or another supported library if preferred.
Serializing Java Objects to JSON Requests
When sending a request, it's just as simple to convert a POJO into a JSON payload. Suppose you want to create a new user:
REST Assured handles the object-to-JSON conversion automatically.
Tips for Success
Ensure your POJOs follow standard Java bean conventions (private fields with getters and setters).
For nested JSON structures, create nested POJO classes.
Use libraries like Jackson or Gson for advanced scenarios (custom serializers, deserializers, or annotations).
Validate responses and requests by mapping to POJOs to keep tests maintainable and clear.
With these conversions in place, you can write more expressive and robust API tests without dealing with raw JSON strings.
Error Handling Best Practices
Implement robust error handling in REST Assured:
java
try {
    RestAssured.given()
        .when()
            .get("/api/users")
        .then()
            .statusCode(200)
            .body("users", not(empty()));
} catch (AssertionError e) {
    // Log the error
    System.err.println("API validation failed: " + e.getMessage());
    // Custom error handling
    handleTestFailure();
} catch (Exception e) {
    // Handle unexpected errors
    System.err.println("Unexpected error in REST Assured test: " + e.getMessage());
    throw e;
}
Remember to implement proper logging and error reporting in your REST Assured tests to make debugging easier when issues arise. This structured approach to response handling ensures your API tests are both thorough and maintainable.
Understanding Authentication vs Authorization in REST APIs
These two concepts might sound interchangeable, but in REST API testing, and design, they play distinctly different roles. Let’s break down what each one means and how they impact your API workflows.
Authentication: Proving Your Identity
Authentication is all about verifying who a user or client is. In other words, it’s the digital equivalent of showing your ID badge before entering an office building. For REST APIs, this often involves methods like:
Username and password (Basic Auth)
OAuth 2.0 tokens (think Google or GitHub login)
API keys passed with your request headers
Proper authentication ensures the API knows who is making the request before granting access to any data or resources.
Authorization: Deciding What You Can Access
Once authentication confirms your identity, authorization kicks in. This process determines what you're allowed to do. Returning to our office analogy, after showing your ID, authorization defines which floors or rooms you have permission to access.
Helpful ways REST APIs enforce authorization include:
Role-based permissions, users vs admins may see different endpoints
OAuth scopes that limit access to specific features
Access control lists for granular resource permissions
Key Distinctions in Practice
Authentication: "Are you really who you claim to be?”
Authorization: "Given your identity, what actions are permitted?"
You need both for robust API security. Think of authentication as the locked front door, while authorization is the rules about which rooms inside the building you can enter. Together, they help keep your APIs, and data, secure, reliable, and well-organized.
JSON Manipulations
What is JSON?
JSON (JavaScript Object Notation) is a lightweight data-interchange format that's easy for humans to read and write, and easy for machines to parse and generate. It's commonly used to transmit data in web applications.Working with JSONPath
JSONPath allows you to navigate and query parts of a JSON document, similar to how XPath works with XML. This is especially useful for extracting specific data from API responses.Expressions in JSONPath
You can use expressions within JSONPath to filter or locate precise elements in complex JSON structures, making data validation simpler and more robust.Deserialize JSON Array to List
REST Assured can deserialize a JSON array response directly into a Java , making it easy to work with collections of objects.Deserialize JSON Response to an Array
Similarly, you can map a JSON response to an array, which is useful when you expect a fixed-size set of items.
With these capabilities, REST Assured makes it straightforward to handle JSON data in your API tests, from constructing requests to parsing and validating responses.
Working with JSON Arrays in REST Assured
Handling JSON arrays is a common requirement when working with API responses. REST Assured makes it straightforward to deserialize JSON arrays into Java collections or arrays for further assertions and verifications.
Deserializing a JSON Array into a Java List
To convert a JSON array response directly into a Java List, you can leverage the extract().as() method along with the appropriate type reference:
Alternatively, if you're dealing with simple value types (like strings or integers), you can use:
Deserializing into a Java Array
If you prefer working with arrays, REST Assured allows you to map the response to a Java array as well:
This approach is particularly useful when you expect a well-defined structure and want to take advantage of array-based operations.
JSON Manipulation Made Simple
Working with JSON is at the heart of most API testing, and REST Assured makes it a breeze by leveraging Java's features alongside built-in JSONPath capabilities. Here’s how you can take control of your JSON data:
Effortless JSONPath Queries
Extract specific fields from JSON responses using JSONPath expressions.java // Query a JSON array for specific values List emails = RestAssured.given() .when() .get("/users") .then() .extract() .jsonPath().getList("users.email");
Evaluating Expressions in JSONPath
Use JSONPath to filter and validate data directly within your tests.java // Find all users with status 'active' List activeUsers = RestAssured.given() .when() .get("/users") .then() .extract() .jsonPath().getList("users.findAll { it.status == 'active' }.id");
Deserializing JSON Arrays to Java Lists
Seamlessly convert JSON arrays into Java collections for further processing.java // Deserialize JSON array to a List of custom User objects List userList = RestAssured.given() .when() .get("/users") .then() .extract() .body() .jsonPath() .getList("users", User.class);
Deserializing JSON Responses to Arrays
Convert entire JSON responses into Java arrays or objects as needed.java // Deserialize JSON response to a Java array User[] users = RestAssured.given() .when() .get("/users") .as(User[].class);
With these capabilities, REST Assured empowers you to write tests that are not only concise and expressive but also make full use of Java’s strengths for manipulating and validating JSON data. This seamless handling of JSON, paired with Java-native features, enables more robust and maintainable API tests.
Tip:
Always ensure your target class (e.g., User) matches the structure of the JSON objects in the array for seamless deserialization.
By understanding these deserialization methods, you can efficiently process array data in your API tests, enabling more comprehensive validations and cleaner assertions.
Headers Configuration
Configure headers in REST Assured to handle different content types and authentication:
Best Practices for Building a Robust REST API Testing Framework
When designing a REST API automation framework, consider structuring your approach for clarity and scalability. Here are some key concepts that enhance your framework:
API Documentation: Always keep thorough documentation of your endpoints, parameters, and expected responses. This aids both development and testing teams.
Test Layer Separation: Separate your test logic from service calls. This keeps your test code clean and maintainable.
Request/Response POJOs: Convert JSON request and response bodies to Plain Old Java Objects (POJOs) for type safety and easier test data management.
Implementing REST Routes: Encapsulate your API endpoints and routes, making them reusable and reducing duplication.
Use of Generics: Utilize generics in your framework to handle various types of requests and responses efficiently.
Refactoring Headers: Centralize header configuration, as shown above, to avoid repetition and simplify updates for all API calls.
Sharing Context: Implement mechanisms to share test and scenario context, ensuring data consistency across multiple API calls.
Configuration Reader: Use a dedicated configuration reader to manage environment-specific settings like base URLs and authentication tokens.
By incorporating these principles, your REST API automation will be more maintainable, scalable, and easier to troubleshoot as your application evolves.
Best Practices for REST Assured Testing
Making your REST Assured tests robust and maintainable requires following industry best practices. Let's explore key strategies that will elevate your API testing game.
Framework Integration
REST Assured works best when properly integrated with testing frameworks:
java
@Test(groups = "api") public class ApiTest { private static RequestSpecification requestSpec;@BeforeClass public void setupRestAssured() { requestSpec = RestAssured.given() .baseUri("https://api.example.com") .contentType(ContentType.JSON) .filter(new ResponseLoggingFilter()); }
}
Assertion Strategies

Test Data Management
Organize your test data effectively:
java
public class TestDataManager { private static final String TEST_DATA_PATH = "src/test/resources/testdata/";public static String getTestData(String fileName) { return new File(TEST_DATA_PATH + fileName) .readText(); } public static RequestSpecification createTestRequest() { return RestAssured.given() .body(getTestData("user.json")); }
}
Error Handling Guidelines
Implement comprehensive error handling in REST Assured:
java
@Test public void userApiTest() { try { Response response = RestAssured.given() .spec(requestSpec) .when() .get("/users") .then() .log().ifError() .extract().response();// Custom validation validateResponse(response); } catch (AssertionError e) { logger.error("API test failed: {}", e.getMessage()); throw e; }
}
Remember these key points for maintaining high-quality REST Assured tests:
Keep your test code clean and well-organized
Use reusable components for common operations
Implement proper logging and reporting
Regularly update your REST Assured version for the latest features and security patches
By following these best practices, you'll create more reliable and maintainable API tests with REST Assured.
Sharing Test and Scenario Context
Effective management of test and scenario context ensures your automated API tests remain robust and maintainable. This is especially useful when tests need to access shared state, like authentication tokens, generated user IDs, or settings, across different steps.
Here’s how you can tackle this:
Test Context Objects:
Create a plain Java class (sometimes calledTestContextorScenarioContext) that holds values you want to share across tests or scenario steps. This class might include fields for user details, response payloads, and session variables.Thread Safety:
If you run your tests in parallel (using JUnit, TestNG, etc.), make sure the context objects useThreadLocalor are otherwise isolated per test thread to avoid unwanted interference.Consistent Access:
Store and retrieve information in your context object throughout your test lifecycle. For example, store an API response after one step, and fetch data from it in a subsequent step.Example Implementation:
Integration with Testing Frameworks:
Many frameworks, like Cucumber and JUnit, can inject or manage context objects for you, passing one instance per scenario or test case.
By centralizing shared data in a dedicated context object, you’ll streamline your test code and sharply reduce coupling between steps.
Advantages of REST Assured
REST Assured has become a go-to choice for API testing, and for good reason. Let's explore the key benefits that make it stand out among other testing frameworks.
Comprehensive RESTful API Testing
REST Assured is a Java-based library designed specifically for testing RESTful Web Services. Acting as a headless client, it empowers you to craft highly customizable HTTP requests, covering everything from simple GET calls to complex POST payloads. This flexibility means you can test a wide variety of request combinations, ensuring your application's core business logic is thoroughly validated.
Seamless Java Integration
REST Assured's deep integration with Java offers significant advantages:
java
// Example showing Java-native features in REST Assured
public class ApiTest {
    @Test
    public void demonstrateJavaIntegration() {
        List<String> userIds = RestAssured.given()
            .when()
                .get("/users")
            .then()
                .extract()
                .jsonPath().getList("users.id");

        // Use Java streams for processing
        userIds.stream()
            .filter(id -> Integer.parseInt(id) > 100)
            .forEach(this::validateUser);
    }
}
Flexible and Powerful HTTP Requests
With REST Assured, you can easily create and modify HTTP requests to suit your testing needs. Whether you need to tweak headers, query parameters, or authentication methods, REST Assured provides a fluent API that keeps your tests readable and maintainable.
Feature Comparison

REST Assured stands out due to its ability to not only construct requests but also to validate responses at every level. For example, you can verify the HTTP status code, status message, headers, and even parse and assert values within the response body. This level of detail makes it an exceptionally flexible tool for both simple and sophisticated API validation requirements.
Enhanced Productivity
REST Assured streamlines the testing process:
java
// Example of simplified authentication and validation
RestAssured.given()
    .auth().oauth2(token)
    .when()
        .post("/api/data")
    .then()
        .log().ifValidationFails()
        .assertThat()
        .statusCode(201);
Flexible Response Handling in REST Assured
REST Assured shines when it comes to extracting and validating API responses. You can seamlessly process status codes, headers, and response bodies, all within your Java tests.
Validate Response Status:
Easily check if your endpoint returns the expected status code.Validate Response Headers:
Confirm that crucial headers are present and have correct values.Read and Parse JSON Response Body:
Access and manipulate JSON payloads with powerful JSONPath support.
These capabilities let you validate every aspect of your API and ensure your test suite covers all critical responses. With REST Assured's intuitive syntax, you can quickly configure your test environment, send requests, and comprehensively validate results, making your API testing both thorough and efficient.
Remember, REST Assured's combination of simplicity and power makes it an excellent choice for both beginners and experienced testers alike. Its extensive feature set continues to evolve, making it a reliable tool for modern API testing needs.
Validating API Response Body Content
So, how do you actually check that your API spits out the right data? REST Assured makes this surprisingly painless. With its user-friendly syntax, you can write snappy tests that not only send HTTP requests but also peek at the contents of the response.
Let's say you want to make sure your API's /greeting endpoint returns the famous "Hello, World!" message. Here’s how you can put that to the test:
Here’s the breakdown:
given(): Prepares any request setup (like headers or query parameters).
when(): Tells REST Assured you’re about to make a request.
get("/greeting"): Makes a GET call to your API’s
/greetingendpoint.then(): Time for checks!
body("content", equalTo("Hello, World!")): Verifies the JSON response has a key named
contentwith exactly the value you expect.
This way, you can catch mistakes in your API’s output before they slip through the cracks. Want to check more fields or values? Just add more checks to your heart’s content!
Validating Content Type in REST Assured
Now that your setup is humming along, let's talk about ensuring your API responses come back exactly as expected, right down to the content type. Why does this matter? Well, the content type tells your application what kind of data it's dealing with, like JSON, XML, or good old HTML. If your API promises JSON but sneaks in some HTML, things can get weird fast.
Here's how you can verify the content type in REST Assured without breaking a sweat:
This quick test checks that your API response is coming back as HTML. If you need to check for other content types, like ContentType.JSON for JSON responses, just swap it in.
Catching mismatched content types early means you're less likely to run into head-scratching bugs down the line. REST Assured makes that check a breeze, so you can keep your API communications as clear as a bell.
Accessing Secured APIs with REST Assured
Many real-world APIs require authentication, and REST Assured makes it refreshingly simple to test these protected endpoints. Whether you’re dealing with basic credentials or more advanced OAuth flows, the framework streamlines the entire process so you can focus on what matters, ensuring your API behaves as expected.
Authentication Mechanisms Supported
REST Assured supports several common authentication methods out of the box:
Basic Authentication: The classic username-and-password combo, sent securely in the header.
Digest Authentication: A more secure twist on Basic Auth, useful for certain enterprise APIs.
OAuth 1.0a & OAuth 2.0: Modern, token-based authentication for delegated, secure resource access.
Quick Examples
Let’s peek at how easy it is to implement both Basic and OAuth authentication in your tests:
Basic Authentication
Here’s how you’d test an endpoint that requires basic credentials:
Just call .auth().basic() and REST Assured handles the rest, no manual header crafting required.
OAuth 2.0 Authentication
For endpoints protected by OAuth 2.0 tokens, the process is similarly straightforward:
Simply provide your bearer token using .auth().oauth2(), and you’re set to test even highly secure APIs.
As you can see, REST Assured handles the complexity behind the scenes, letting you focus on writing clear, intention-revealing tests for every kind of secured API you encounter.
Validating HTTP Headers with REST Assured
Headers are like the sticky notes of your API responses, they carry important context, such as content type or authentication details. With REST Assured, checking these headers is refreshingly simple.
Suppose you want to make sure your API is returning the expected Content-Type. Here’s how you can add that verification to your test:
You can assert on other headers just as easily, just provide the header name and expected value. REST Assured will automatically flag the test if the actual response doesn’t match your expectation. This makes it a breeze to ensure your API is sending all the right signals back to the client.
Understanding REST Assured's DSL
One of the standout features of REST Assured is its intuitive domain-specific language (DSL). In plain English, this means you get to write your API tests in a way that’s not only powerful but also easy to read, almost like writing out your test in step-by-step sentences.
With REST Assured’s DSL, you can:
Set up and execute HTTP requests (like GET, POST, PUT, DELETE)
Check status codes to see if your API responds as expected
Inspect headers, cookies, and the body of your responses
Chain together commands for more complex validations
Here's how it feels in action: Suppose you want to test an endpoint that greets users. REST Assured lets you structure your test in a readable, almost conversational format using keywords like given, when, and then. For example:
This approach makes it crystal clear what you're testing. You define your starting conditions with given(), send your request with when(), and assert what you expect to happen with then(). Whether you're checking that a user creation request returns the correct status or verifying the contents of a response, REST Assured’s DSL streamlines the process and keeps your tests concise.
With just a few lines, you can express complex validations, no more deciphering cryptic code or endlessly scrolling through documentation. And if you need to ramp things up (like validating headers, cookies, or more intricate JSON structures), REST Assured’s DSL has you covered.
How to Perform OAuth Authentication with REST Assured
Securing your API tests often means dealing with authentication, and one of the most robust methods out there is OAuth. REST Assured makes it surprisingly straightforward to test endpoints protected by OAuth 1.0a or OAuth 2.0, even if the underlying handshake is anything but simple.
To set up an OAuth 2.0 authentication flow in your tests, you'll typically use an access token granted by your identity provider. REST Assured provides a fluent and intuitive way to include that token with your requests. Here’s what the process looks like in practice:
Example: Authenticating requests with OAuth 2.0
Just replace "yourAccessTokenHere" with your actual token (often fetched programmatically or set through environment variables). This tells REST Assured to include the OAuth Bearer token in the Authorization header, granting you access to secured endpoints. It's as simple as chaining .auth().oauth2(token) into your request.
You can use similar patterns for OAuth 1.0a, with methods tailored for consumer keys and secrets. No matter the OAuth flavor, REST Assured helps you keep authentication code clean and your tests reliable.
How to Parameterize Tests in REST Assured
Let’s face it, testing is a lot more interesting (and powerful) when you run the same test across multiple data sets. Parameterization lets you put your API through its paces with a variety of inputs, all without duplicating code like a robot on repeat.
REST Assured plays nicely with popular Java testing frameworks like JUnit and TestNG. That means you can feed your tests with different inputs by leveraging their built-in parameterization features. Here’s how you can do it:
Using TestNG’s DataProvider for REST Assured Tests
TestNG makes parameterization a breeze with its @DataProvider annotation:
Each time the test runs, it picks up a new user ID from the provider. You can do the same with different endpoints, request bodies, or expected results.
More Ways to Mix Things Up
JUnit (with
@ParameterizedTestand data sources): Great if you’re in the JUnit camp.CSV or external sources: Perfect if you crave flexibility, just load your test data from files.
The real win? You maximize test coverage with minimal code and catch edge cases early, before they become mysterious production bugs.
Pro Tips for Mastering REST Assured
Once you're comfortable with the basics, it's time to level up your REST Assured game. Here are some expert strategies to help you write cleaner, more powerful API tests:
Use Request Specifications for Consistency: Instead of repeating headers, authentication settings, and base URIs in every test, set up a reusable request specification. This keeps your test code DRY (Don't Repeat Yourself) and easier to maintain.
Build More Flexible Validations with Custom Matchers: While REST Assured’s built-in assertions cover most needs, sometimes you’ll want more nuanced checks. By creating custom Hamcrest matchers, you can validate everything from nested JSON properties to specific response patterns.
Embrace Data-Driven Testing: Feeding different test scenarios into your tests is a breeze when you pull data from CSV or JSON files. This approach lets you cover a wider range of cases without cluttering your code with repetitive test methods.
Chain Requests for Realistic Flows: APIs rarely work in isolation, you might log in, create a resource, then update or delete it. REST Assured makes it simple to chain these calls together within your tests, helping you verify how endpoints work in sequence (think: real-world workflows).
Supercharge Your Reports: Don’t let your hard-earned test results disappear into the void! Pair REST Assured with reporting tools like Allure to visualize pass/fail rates, log detailed steps, and understand test coverage at a glance.
With these techniques, you'll be well on your way to building robust, maintainable, and insightful API test suites using REST Assured.
Passing Parameters Between REST Assured Tests
Let's say you’re testing an API workflow where you first create a resource, like adding a new user, and then need to reference that specific user in a follow-up test, such as deleting them or updating their information. REST Assured makes this a breeze by allowing you to capture values (like resource IDs) from one request and reuse them in another.
Here’s how you can make this magic happen:
Extract a value from the response. When you send a request to create a resource, REST Assured lets you grab information (such as the ID) directly from the response. This is typically done using the
extract().path()method.Reuse that value in later requests. Once you’ve got the ID, you can pass it as a parameter to future requests, think of it as passing a baton in a relay race.
Here’s a simple example to illustrate the process:
In this scenario, we first add a user, extract the returned id, and then use that same ID to delete the user, all within a single test class. This approach helps you maintain state across calls and keeps your test logic clear and maintainable.
REST Route Implementation and the Power of Generics
A robust API automation framework isn’t just about sending requests, it’s about maintainability and scalability, especially as your suite grows. Two important practices help achieve this: structuring REST routes and leveraging generics.
Structuring Your REST Routes
Maintaining clear and reusable REST route definitions is a game changer for effective automation. Rather than scattering endpoint paths throughout your tests, define your routes in a centralized location, usually as constants or within an enum class in Java.
This approach offers several perks:
Improved Readability: Team members quickly see what endpoints exist and how they're structured.
Easier Updates: Change a route in one place, and all your tests automatically reference the update.
Consistent Usage: Reduces typos and keeps endpoints well organized.
For example:
When writing your test cases, you reference ApiRoutes.USERS, clear and concise.
Implementing Generics for API Reusability
APIs often share request and response patterns. Instead of rewriting similar code for each endpoint, generics allow you to generalize your test method signatures and response handling.
Why use generics?
Type Safety: No more unchecked casts, compile-time checks ensure you’re getting the data structures you expect.
Reusability: Write a single method to deserialize responses into any POJO (Plain Old Java Object) you define.
Cleaner Code: Minimize duplication and confusion.
Consider a simple generic utility for parsing responses:
Now, whether you’re testing a user resource or a product catalog, you can seamlessly convert JSON responses into the right Java objects.
By thoughtfully implementing clear REST route management and harnessing the flexibility of generics, your API framework becomes both more maintainable and adaptable. As your APIs evolve, these architectural choices will save you countless hours of refactoring and debugging.
Integrating REST Assured with Other Frameworks
Curious about taking your API tests to the next level? REST Assured isn’t just a solo act, it plays nicely with powerful frameworks like Serenity BDD. By integrating REST Assured with Serenity, you can combine the robust API validation features of REST Assured with the rich reporting and behavioral-driven development (BDD) capabilities of Serenity.
Here’s what this combo brings to the table:
Seamless Test Automation: Write your REST Assured tests using Serenity’s test runners (like JUnit or Cucumber), making your API scenarios both easy to read and maintain.
Enhanced Reporting: Serenity automatically generates detailed, visually-engaging test reports that help you trace each API request, response, and assertion.
Traceable BDD Workflows: If you’re a fan of Gherkin syntax, you can define API behaviors in plain English, allowing technical and non-technical team members to collaborate on what should be tested, and why.
To get started, you simply include both REST Assured and Serenity dependencies in your project. From there, you can structure and execute your API test cases using familiar BDD practices, while still reaping all the advantages REST Assured brings.
With this integration, API testing becomes more than just validation, it’s now a cornerstone of your entire development process, leaving no bug or misbehaving endpoint hidden under the rug.
Conclusion
REST Assured stands out as a powerful tool for API testing, combining Java's robustness with intuitive syntax. Whether you're a beginner starting with API testing or an experienced tester looking for efficient solutions, REST Assured offers the flexibility and features you need. From its seamless BDD approach to comprehensive response validation capabilities, it streamlines the entire testing process. By following the best practices and implementation steps outlined in this guide, you'll be well-equipped to create reliable, maintainable API tests that ensure your applications work flawlessly.